If you have just picked up your first rod and reel, you probably feel something between excitement and panic when you walk into the tackle aisle. Hundreds of lures, hooks, weights, and accessories line the shelves, and nothing seems to come with a label that says “start here.” This guide is that label. It gives you a practical, prioritized checklist of the items you actually need for your first tackle box, organized by what to buy first and what to add later.
You do not need everything on the shelf. You need a small collection of versatile items that work across the most common freshwater fishing situations. That is the core idea behind a tackle box starter kit: pick a few things that do a lot, not a lot of things that do a little.
Why Your First Tackle Box Should Be Simple
Walking into a fishing store for the first time is genuinely overwhelming. The tackle section is designed to show you everything that exists, not everything you need. The temptation is to buy a little bit of everything, which leads to a box full of items you will rarely use and a budget stretched thin.
The Versatile-Over-Specialized Philosophy
The goal of your first tackle box is broad coverage, not niche perfection. A handful of well-chosen soft plastics, a couple of essential hook sizes, some basic weights, and maybe one or two hard baits will handle the majority of beginner freshwater fishing scenarios. Soft plastics — flexible, reusable vinyl lures — form the foundation. Unlike hard baits, which have hooks already attached, soft plastics need to be rigged on hooks, and that is where a lot of beginners get confused. The good news is that once you understand how to rig them, the same soft plastic can be presented in multiple ways depending on conditions.
For a deeper breakdown of soft plastic types and how they work, check out our complete soft plastic guide.
How Much Should a Beginner Spend?
A complete starter kit typically costs between approximately $40 and $80, though prices vary by retailer, location, and season. You can build a functional starter setup at the lower end and expand from there as you learn what works in your local waters. We break down three budget tiers later in this guide.
Tier 1: The Essentials to Buy First
These six items cover the majority of beginner freshwater fishing situations. If you are on a tight budget, start here before looking at anything else.
Soft Plastic Worms and Stick Baits
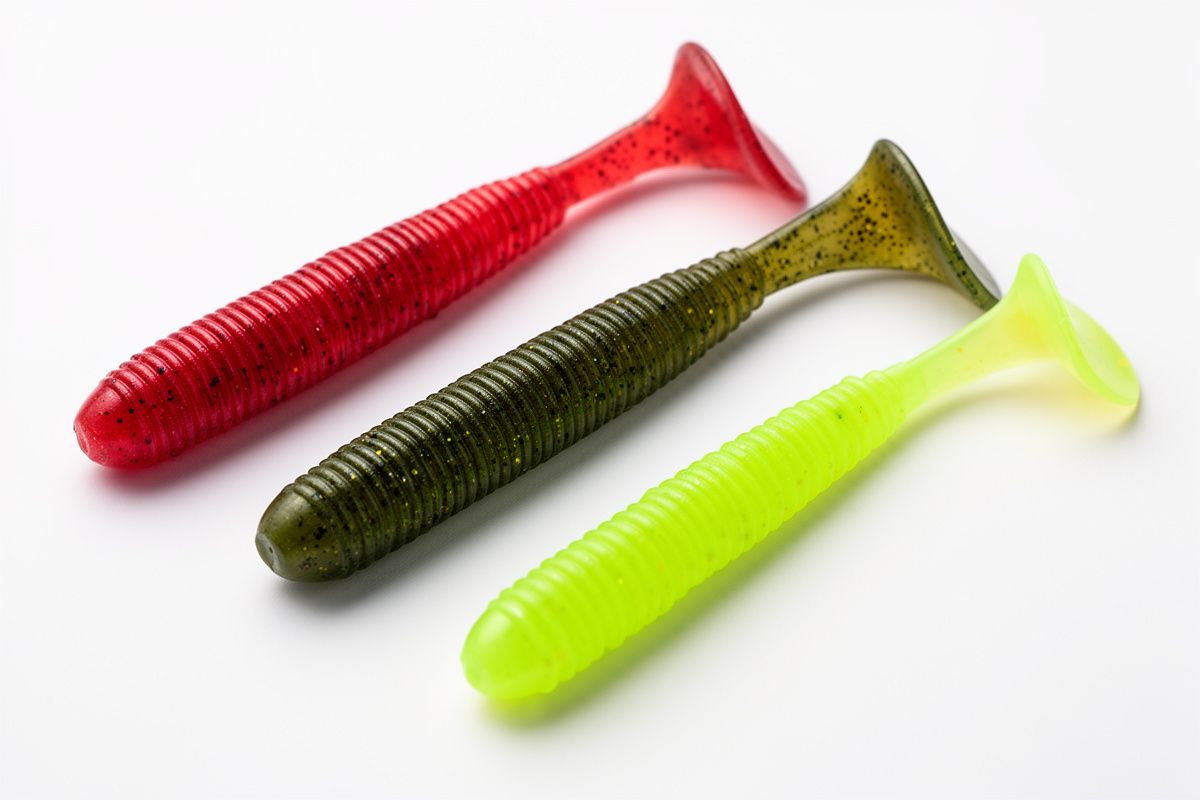
Soft plastics are the workhorses of a beginner tackle box. They are durable, reusable (as long as the hook does not tear through), and affordable. For your first purchase, focus on two shapes: a 4.5 to 5-inch ribbontail worm and a 4.5-inch stick bait.
Ribbontail worms have internal ribbons that create vibration and movement in the water, even during slow retrieves. They are among the most common beginner worm shapes for good reason — they work in almost every freshwater situation. A stick bait, sometimes called a senko-style worm, is equally valuable. It has a straight, uniform body with no built-in tail action, but it can be rigged in at least four different ways: weightless, Texas-rigged, wacky-rigged, or mounted on a jig head. That versatility makes it one of the most useful plastics you can own.
For color, start with watermelon red or green pumpkin. These natural shades work well in clear to slightly stained water, which covers the conditions most beginner anglers encounter. Buy 2–3 colors of each shape rather than 10+ colors of a single shape. You will learn more by fishing the same plastic in different conditions than by having a rainbow of options you never switch between.
Soft Plastic Grubs
Add a pack of 3-inch curly-tail grubs to round out your soft plastic selection. The curling tail paddle on a grub creates natural action without requiring a fast retrieve, which makes them forgiving for beginners still working on their retrieve technique. Grubs are effective for bass and panfish, and they can also attract catfish in many situations. Chartreuse or black/blue are good starting colors — chartreuse shows up well in stained water, while black/blue offers high contrast that works across a range of conditions.
Offset Worm Hooks
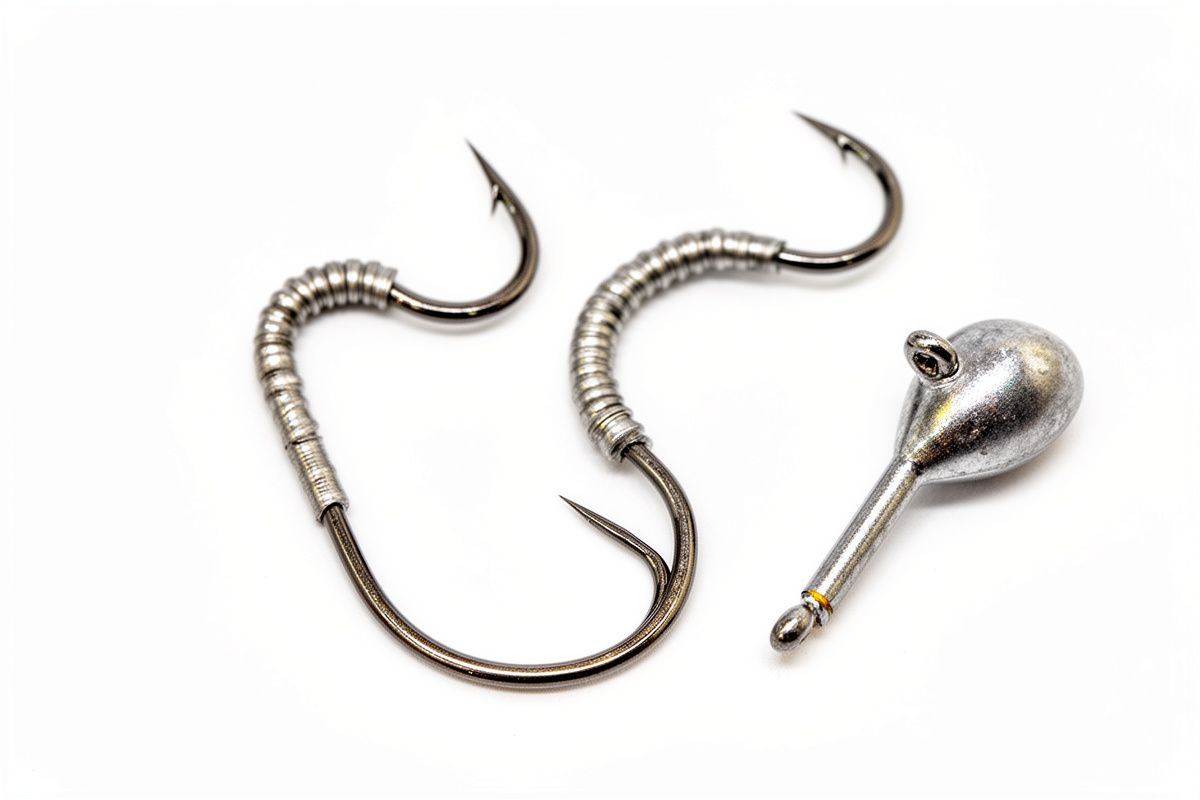
This is where a lot of beginners stumble. Soft plastic lures are useless without hooks to rig them, yet many new anglers buy packs of worms and forget the hooks entirely. Offset worm hooks are the primary hook type for soft plastics. The “offset” refers to a slight bend near the eye of the hook that positions the point for better penetration when setting the hook.
For your starter kit, get two sizes: size 2 and size 3/0. Size 2 handles plastics in the 2–3 inch range (like your grubs), and size 3/0 works for 3–5 inch plastics (your ribbontail worms and stick baits). Look for wide-gap (WG) offset hooks, which are the standard design for soft plastic applications. A pack of 12–25 hooks typically costs between approximately $2 and $6, so you can afford to have spares.
Split Shot Weights
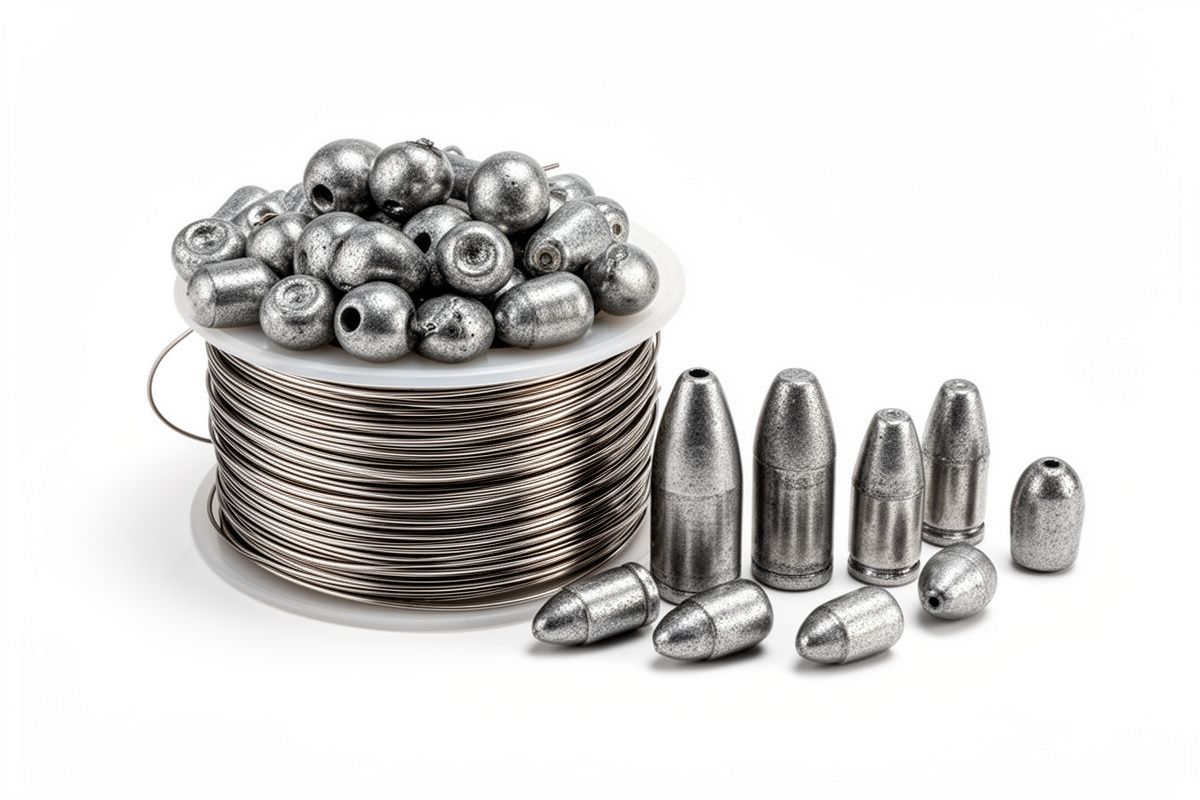
Split shot weights are small, round lead weights that you crimp onto your fishing line with a pair of pliers. They are adjustable and removable, which makes them ideal for beginners who are still learning what depth their fish are holding at. If your bait is sinking too fast, simply remove a split shot. If it is floating too high, add one. This trial-and-error flexibility is exactly what a beginner needs.
A single spool of split shot costs approximately $1–$3 and lasts a long time. They work for everything from panfish presentations to basic bass setups.
Note on lead weights: Some states and specific water bodies have restrictions on lead sinkers due to environmental concerns. Consider lead-free alternatives like tungsten or steel weights if you are fishing in areas with lead restrictions. Tungsten weights are denser than lead, meaning a tungsten weight of the same ounce rating is smaller and reaches depth more quickly, though they cost approximately 3–5 times more. Check your local fishing regulations to see what applies where you fish.
Slider Bobbers
A bobber (or float) serves two purposes: it suspends your bait at a chosen depth and gives you a visual bite indicator. For beginners, a slider bobber is the most practical type. Unlike a fixed bobber, a slider bobber moves freely on your line, and you set the fishing depth using a small rubber or foam bobber stop. This means you can fish from near the surface down to several feet without changing your setup.
Bobber fishing is especially effective for panfish and works well when fishing from the shore. It is less ideal for deep-water bass fishing, but for most beginner scenarios at ponds and shallow lakes, a slider bobber is a simple, reliable tool. One or two bobbers plus a small pack of bobber stops costs only a few dollars.
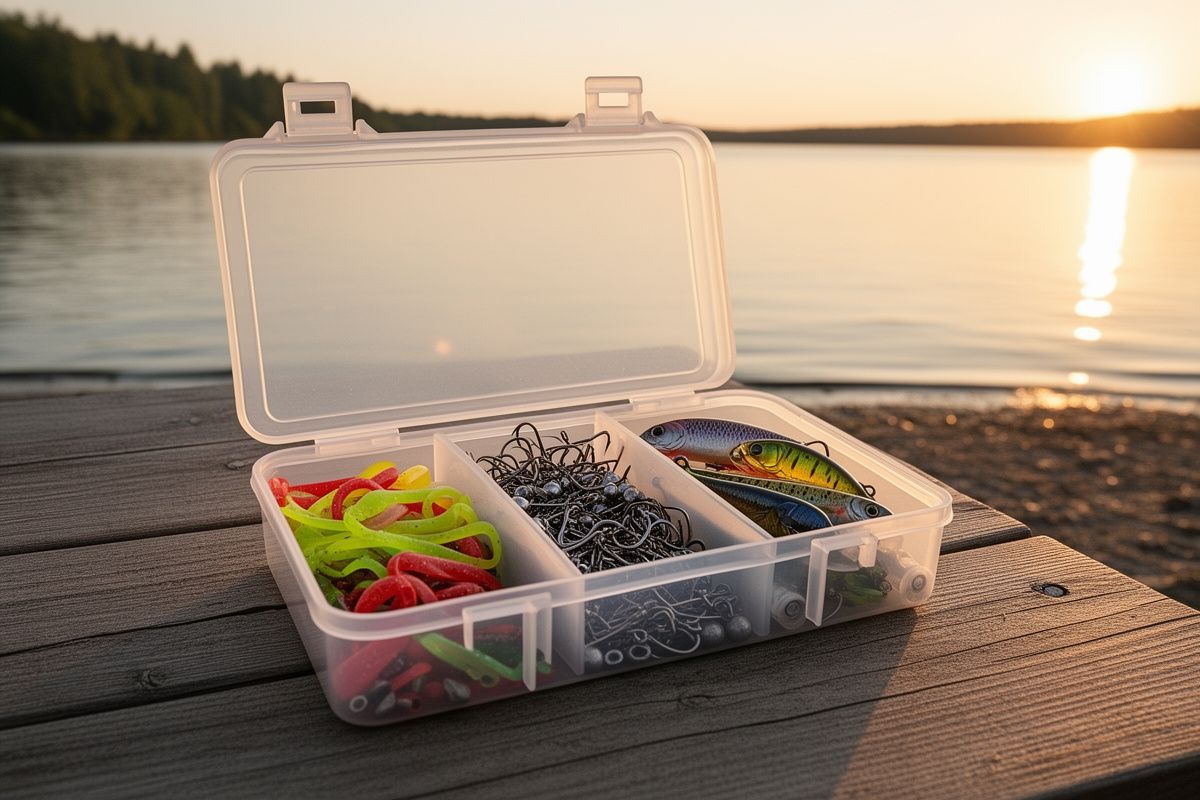
A Basic Tackle Box to Hold It All
Before we talk about choosing the right box, it is worth saying this: you need a container. Tossing hooks, soft plastics, and weights into a ziplock bag works for one trip but quickly becomes a frustrating mess. A proper tackle box with compartments keeps things organized, protects your gear, and saves you from fumbling in the dark while a fish waits on the line.
We cover box selection in detail in the next section.
Tier 2: What to Add Next
Once you have your Tier 1 essentials and have fished a few times, these six items expand your coverage and address situations the basics do not handle as well.
Football Jig Heads
A jig head is a pre-weighted hook designed specifically for mounting soft plastics. It combines the hook and the weight into one piece, which simplifies rigging. Football jig heads — named for their rounded, football-shaped head profile — are among the most versatile jig head styles available. The rounded profile helps them roll over rocks and glide through vegetation without snagging as easily as pointed heads.
Start with two weights: 1/4 oz and 3/8 oz. The lighter weight works for shallow water (2–4 feet deep), and the heavier weight handles 4–8 feet of water. Mount your grubs or other soft plastics on jig heads for a presentation that combines action from the plastic with bottom-contact from the weight. A pack of 5–10 jig heads typically costs approximately $3–$7.
Bullet Weights for Texas Rigging
Bullet weights are small, streamlined sinkers that slide freely on your fishing line above the hook. They are the standard weight used in Texas rig presentations — a weedless rigging method where the bullet weight sits above a hook that has been threaded through a soft plastic with the point buried in the plastic body. This setup lets the plastic glide through vegetation and cover while maintaining enough weight to reach the desired depth.
Get a small assortment of 1/8 oz and 1/4 oz bullet weights. These two sizes cover most shallow-water Texas rig situations at typical pond and lake depths. If you are fishing deeper reservoirs or moving water, you may eventually need heavier weights, but these two sizes are a solid start.
One Spinnerbait
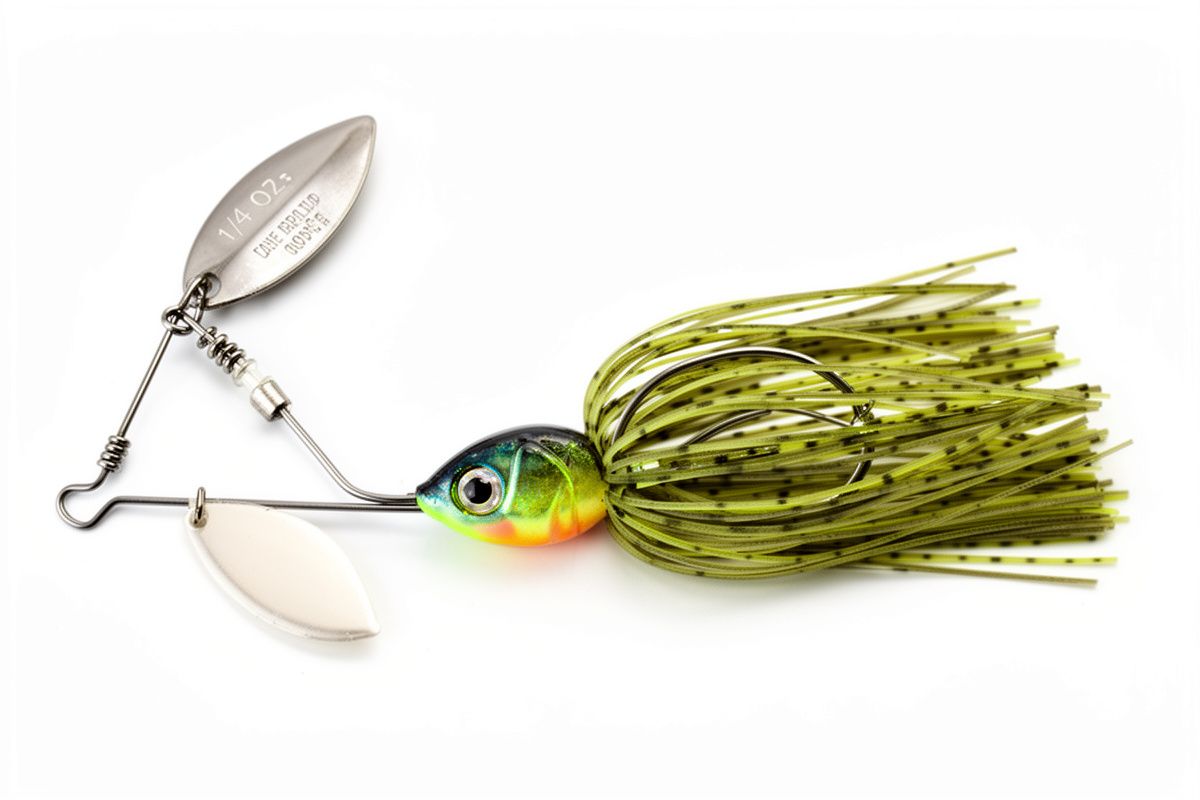
It is time to add your first hard bait. Hard baits are rigid lures with hooks already attached, and they require no rigging — you tie them on and cast. A spinnerbait is an excellent first hard bait because it is weedless (a wire guard protects the hook from snagging) and produces its own vibration and flash through rotating blades.
Look for a standard two-blade spinnerbait in the 1/4 to 3/8 oz range. A Colorado blade (rounded, slower spin, more vibration) paired with a willow leaf blade (teardrop shape, faster spin, more flash) gives you a good balance. Spinnerbaits are particularly effective in stained water and around cover like weed beds and submerged timber. A basic spinnerbait costs approximately $3–$8.
When using a spinnerbait, consider tying it on with a ball swivel to prevent line twist — spinning lures can rotate your line with each cast and retrieve, weakening it over time. We cover swivels in the next subsection.
One Square-Bill Crankbait
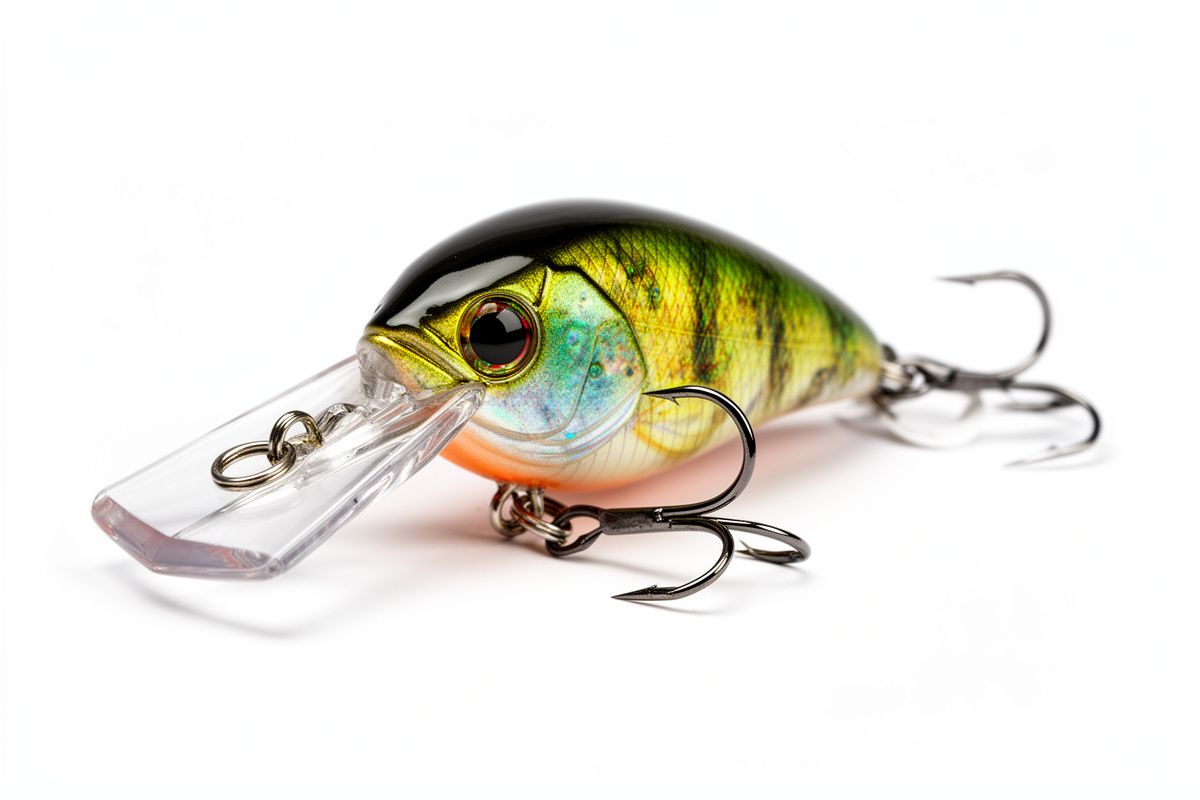
Your second hard bait should be a square-bill crankbait. These lures have a distinctive square-profile diving lip that allows them to make sharp deflections off structure like logs and rocks. They typically run between approximately 4 and 8 feet deep, depending on retrieve speed and line angle, which covers a useful depth range for bass fishing in spring and fall.
A basic square-bill crankbait costs approximately $5–$12. You only need one — it is easy to lose hard baits on structure, so there is no reason to stock up on multiple expensive lures early on. A single spinnerbait and a single square-bill crankbait together cover a wide range of hard-bait situations for a beginner’s first year, though specific conditions may call for additional options later.
Ball Swivels
Swivels are small metal connectors that prevent line twist. When spinning lures like spinnerbaits rotate during a retrieve, they can twist your fishing line, which weakens it and affects casting performance. A ball swivel — the most common type — sits between your main line and your lure, allowing the lure to spin freely without twisting the line above it.
Size 8–10 ball swivels are appropriate for light-to-medium spinning tackle. A small pack costs only a dollar or two and lasts a long time. You will also use swivels when tying on fluorocarbon leaders for clear water fishing, though leaders are not essential for beginners.
If you are unsure which fishing line to pair with your tackle, our line comparison guide breaks down monofilament, fluorocarbon, and braided line for beginners.
Pliers and a Line Cutter
This is not a lure, but it belongs in your tackle box. A pair of fishing pliers handles hook removal, crimping split shot weights, and general on-the-water adjustments. Look for a pair that includes an integrated line cutter, since braided fishing line is difficult to cut with standard scissors. Keep pliers in an accessible location — on your belt, in a vest pocket, or in the lid of your tackle box — rather than buried in a compartment where you cannot find them when you need them.
How to Choose Your First Tackle Box
Box Type: Hinged vs. Stackable vs. Pouch
Three main types of tackle containers are available, and each has trade-offs:
Hinged tackle boxes with 3–4 compartments and adjustable dividers offer the best balance of organization and simplicity for beginners. They provide enough separation to keep items sorted without being overwhelming. Stackable tackle boxes offer more capacity with multiple trays, but they can be unnecessarily complex for a first-time buyer who only has a handful of items. Tackle pouches and rolls are portable and lightweight but offer less protection for your gear and fewer organization options.
For a beginner, a medium-sized hinged box (approximately 10–12 inches wide) with 3–4 compartments is the right starting point.
Key Features to Look For
When shopping for your first tackle box, prioritize these features:
Waterproof or water-resistant construction — moisture causes hooks to rust and degrades soft plastics over time Adjustable dividers — let you customize compartment sizes as your collection changes A secure latch — prevents the box from opening accidentally, especially important when fishing from the shore on uneven ground Durable material — avoid flimsy boxes that crack or warp with regular use
A basic hinged tackle box with these features typically costs approximately $8–$20.
How to Organize Your Tackle Box
Organization is not just about keeping things neat — it is about being able to find what you need while a fish is waiting on the other end of your line. A frustrated beginner spending five minutes digging through a tangled mess of hooks is more likely to give up on fishing than someone who opens their box and sees exactly what they need.
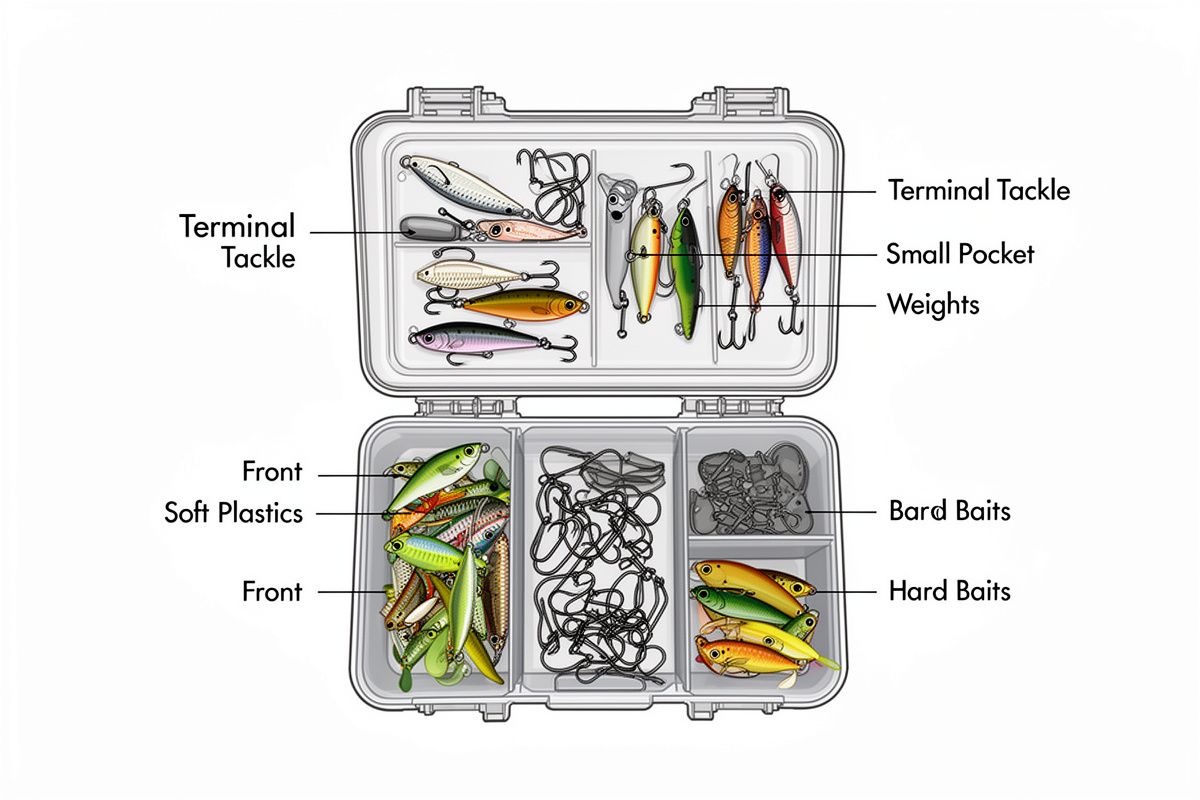
Compartment-by-Compartment Layout
Here is a practical organization system that works with a standard 3–4 compartment hinged box:
Front compartment (most accessible): Soft plastics, stored by shape rather than color. You will reach for these most often, so they should be the easiest to grab. Second compartment: Hooks, organized by type and size. Keep your offset worm hooks and jig heads separated so you can quickly match hook to bait. Small or deep compartment: Weights — split shot on the spool and bullet weights sorted by size. Small items belong in a small compartment where they will not get lost. Back or deep section: Hard baits like your spinnerbait and crankbait. The deeper section protects these more expensive items from damage. Lid or separate pocket: Terminal tackle — swivels, bobbers, bobber stops, and split rings. These are small and infrequently accessed, so tucking them into a lid compartment keeps them out of the main compartments.
Tips for Keeping Things Organized
A few quick habits make a big difference in keeping your tackle box functional:
Use small plastic bags or containers for loose items like split shot, swivels, and bobber stops to prevent them from scattering across compartments. Store soft plastics in a cool, dry place away from direct sunlight. UV exposure and heat degrade the vinyl compound over time, making plastics brittle. If you keep your tackle box in a hot vehicle, consider taking soft plastics out when you get home. Check for rust on hooks periodically and replace any compromised hooks. A rusted hook bends and breaks under pressure. If a soft plastic gets beaten up but not torn, running it under hot water can reshape it closer to its original form — this is a well-known angler trick that extends the life of each bait. Match your hook size to your bait size. Using a 4/0 hook on a 2-inch plastic (or a size 4 hook on a 7-inch worm) results in poor presentations and missed hookups. As a rule of thumb, the eye of the hook should roughly match the width or thickness of the soft plastic being used.
Budget Breakdown: Three Starter Levels
Here is how your starter kit looks at different budget levels. Prices are approximate and vary by retailer, location, and season.
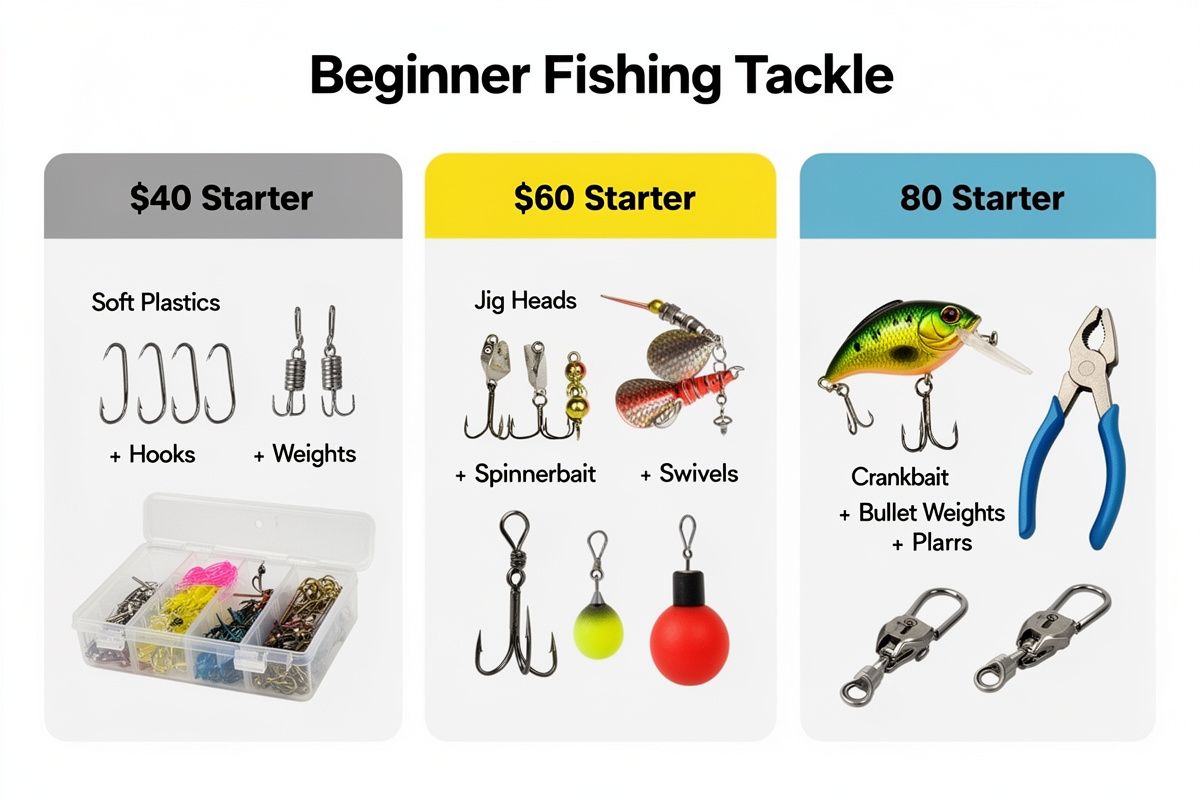
The $40 Starter (Minimum Viable)
This budget gets you three types of soft plastics, two packs of offset worm hooks, a spool of split shot, and a basic hinged tackle box. It covers most common beginner situations at local ponds and shallow lakes. You can fish effectively with just this — it is a solid foundation.
The $60 Starter (Recommended)
At this level, you add a pack of football jig heads, one spinnerbait, a slider bobber with stops, and a small pack of ball swivels. This combination handles a wide range of freshwater scenarios and gives you your first hard bait option. This is the sweet spot for most beginners.
The $80 Starter (Complete Kit)
The top tier adds a square-bill crankbait, bullet weights for Texas rigging, a pair of pliers with a line cutter, and possibly a better-quality tackle box with more durable construction. This kit covers the broadest range of situations a beginner is likely to encounter in their first year of fishing.
Common Mistakes to Avoid
Every beginner makes some tackle-buying mistakes. The goal is to avoid the ones that waste the most money and cause the most frustration.
Buying too many lure colors before mastering the shapes. A beginner with three colors of a ribbontail worm will have better results than someone with 15 different lure shapes in a single color. Shape matters more than color when you are starting out. Forgetting hooks and weights. Soft plastics are useless without hooks to rig them. This is arguably the most common beginner mistake — buying packs of worms and arriving at the water with no way to get them on your line. Having no organization system. Throwing everything into a box without dividers leads to tangled hooks, lost items, and the kind of frustration that causes beginners to abandon fishing altogether. Overbuying expensive hard baits. Crankbaits and spinnerbaits are easily lost on structure. Buying a dozen before understanding how to fish them is wasteful. Start with one of each. Buying specialty tackle too early. Flipping jigs, drop-shot rigs, swimbait setups, and topwater lures are effective tools, but they have steeper learning curves. You rarely need them in your first year. Neglecting maintenance. Leaving soft plastics in hot cars, not checking for rusted hooks, and ignoring damaged tackle box dividers all add up over time. A few minutes of upkeep after each trip keeps everything in shape.
How Your Starter Kit Works Year-Round
One of the strengths of this starter kit is that it is not limited to a single season. The same core items work across spring, summer, fall, and winter with minor adjustments in presentation speed and depth.
In spring, fish are actively feeding and moving into shallower water. Lighter retrieves and your crankbait and spinnerbait excel during pre-spawn and spawn periods. Summer pushes fish deeper or into cover, where slower presentations with your soft plastics become more important. Fall brings aggressive feeding again, and your larger baits with faster retrieves can be very effective. In winter, fish hold deeper and are less active, so small soft plastics on light jig heads with slow presentations are your best option.
Water clarity also shifts seasonally — recent rainfall, temperature changes, and algae blooms all affect how clear the water is. Having both natural colors (watermelon red, green pumpkin) and bolder options (chartreuse, black/blue) in your box covers most clarity conditions. For more on understanding water conditions and how they affect your fishing, see how to read water for fishing.
Keep in mind that seasonal patterns vary by region — spring and fall fishing in Florida looks very different from spring and fall fishing in Minnesota. Use the seasonal guidance as a starting point and adjust based on what you observe in your local waters.
Next Steps: What Comes After Your Starter Kit
This starter kit is a starting point, not a final destination. As you gain experience, you will naturally identify what is missing for the specific waters you fish. Maybe you discover that your local lake has a lot of rocky bottom structure and you want to add craw heads. Maybe you start targeting panfish more regularly and want smaller hooks and lighter tackle. That is how it should work — let your fishing experience guide your purchases, not the other way around.
If you are still building your foundational fishing knowledge, our Beginner Fishing 101 guide covers the basics of getting started, from casting to understanding fish behavior. And if you want to dive deeper into any of the tackle categories covered here, the linked articles throughout this guide provide more detailed explanations.
Before you head out, remember to check your local fishing regulations for licensing requirements, size limits, and bag limits. Rules vary by state and water body, and staying informed is part of being a responsible angler.
Quick Checklist: Your First Tackle Box Shopping List
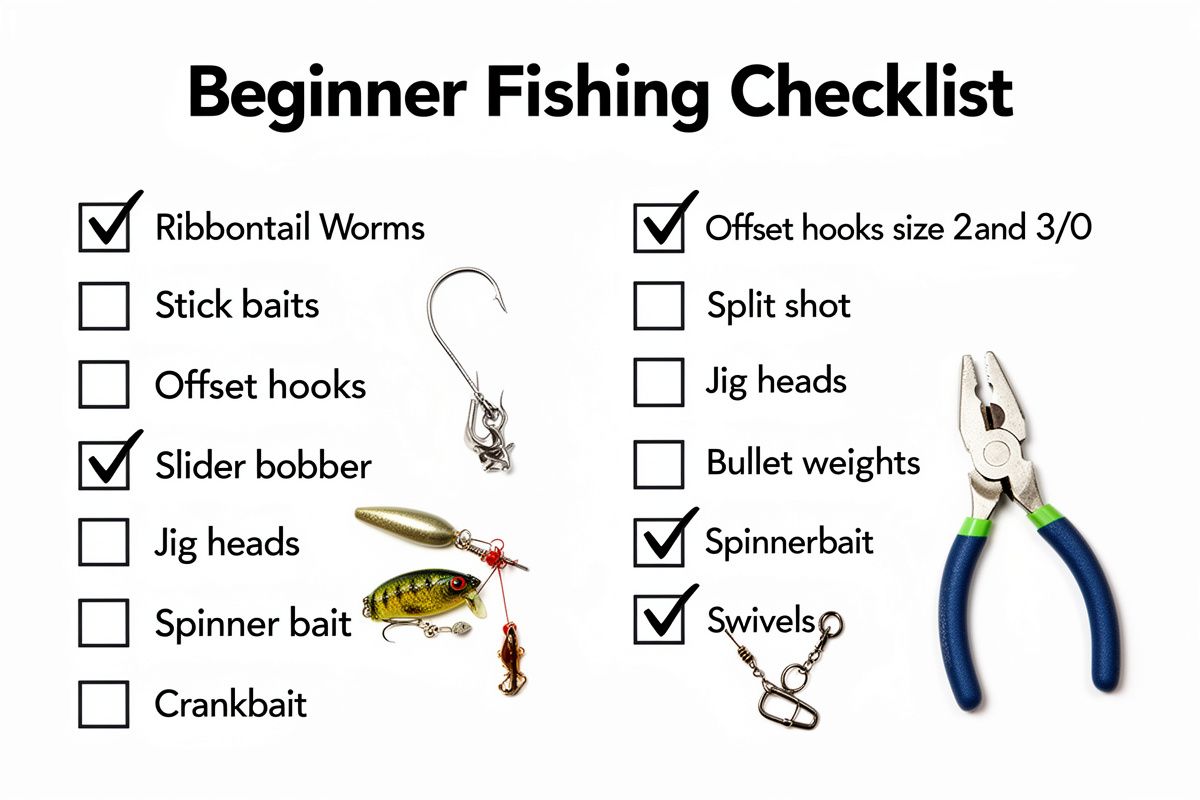
Use this list when you head to the store. Check off items as you add them to your box.
Tier 1 — Buy These First:
- ☐ Soft plastic ribbontail worms (4.5–5 inch, watermelon or green pumpkin)
- ☐ Soft plastic stick baits (4.5 inch, white or green pumpkin)
- ☐ Soft plastic curly-tail grubs (3 inch, chartreuse or black/blue)
- ☐ Offset worm hooks — size 2 and size 3/0 (2 packs)
- ☐ Split shot weights (1 spool)
- ☐ Slider bobber with bobber stops (1–2 bobbers)
- ☐ Hinged tackle box with 3–4 compartments
Tier 2 — Add Next:
- ☐ Football jig heads — 1/4 oz and 3/8 oz (1 pack each)
- ☐ Bullet weights — 1/8 oz and 1/4 oz (small assortment)
- ☐ One spinnerbait (3/8 oz, two-blade)
- ☐ One square-bill crankbait
- ☐ Ball swivels — size 8–10 (small pack)
- ☐ Pliers with line cutter (1 set)
FAQ
What is the most important item for a beginner tackle box?
Soft plastics — specifically a 4.5-inch stick bait and a ribbontail worm — are the foundation. They work across species, seasons, and water conditions. Without soft plastics, most of your other tackle items have nothing to do.
Do I need a lot of different lure colors as a beginner?
No. Start with 2–3 colors: a natural shade like watermelon red or green pumpkin for clear water, and a higher-contrast option like chartreuse or black/blue for stained or murky water. You can expand your color selection later once you understand how water clarity affects fish behavior.
Can I start fishing with just soft plastics and no hard baits?
Absolutely. Soft plastics cover the majority of common beginner freshwater fishing situations. You can have a productive first year fishing with only soft plastics, hooks, and weights. Hard baits like spinnerbaits and crankbaits are useful additions, but they are not a requirement.
How much should I spend on my first tackle box?
A basic hinged tackle box with 3–4 compartments costs approximately $8–$20. Do not overspend on the box itself — the contents matter more. Invest in the tackle first, then upgrade your box later if needed.
What size hooks do I need for soft plastic worms?
Size 2 and size 3/0 offset worm hooks cover the widest range of beginner soft plastic sizes. Size 2 works for 2–3 inch plastics like grubs, and size 3/0 handles 3–5 inch plastics like ribbontail worms and stick baits. As a general rule, the eye of the hook should roughly match the thickness of the plastic you are rigging.
Do I really need a tackle box, or can I use a bag or pouch?
A tackle pouch works for a single trip or two, but a proper tackle box with compartments is worth the investment. Organization prevents tangled hooks, lost items, and the frustration that often causes beginners to give up. If portability is a concern, a medium-sized hinged box (10–12 inches) is light enough to carry easily.
Should I buy lead weights or lead-free alternatives?
Lead weights are the most affordable option and work well in most areas. However, some states and specific water bodies restrict lead sinkers due to environmental concerns. Check your local fishing regulations. If you are in a restricted area or prefer lead-free options, tungsten and steel weights are available. Tungsten is denser and sinks faster at the same weight, though it costs approximately 3–5 times more than lead.
How do I organize my tackle box so I can find things on the water?
Store your most-used items — soft plastics — in the front, most accessible compartment. Keep hooks in the next compartment, sorted by type and size. Put weights in a small compartment where loose items will not get lost. Hard baits belong in a deeper, protected section. Terminal tackle like swivels and bobbers can go in the lid. The key principle is to arrange items by how often you reach for them, with the most frequently used items easiest to grab.