
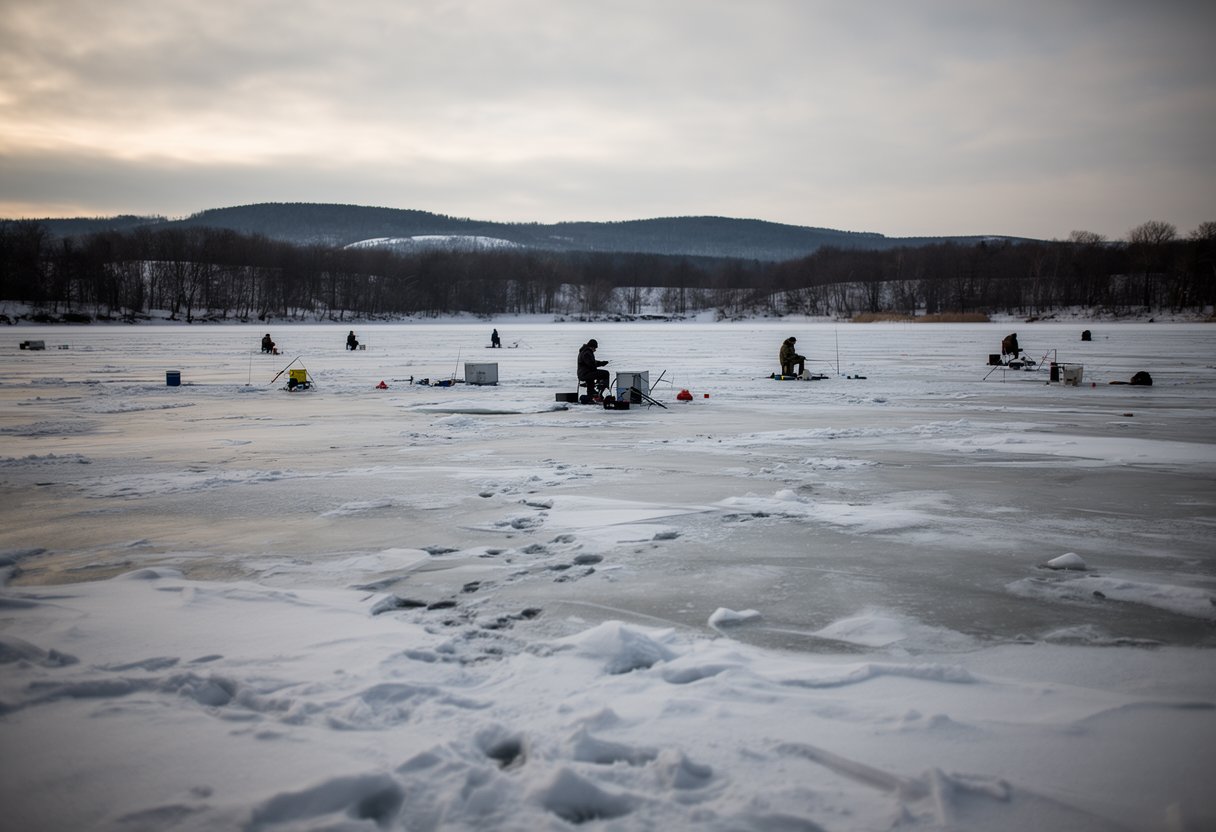
You’ve fished in the summer — maybe caught bass from a bank, caught perch from a dock, or tried your luck at a local pond. But when the water freezes over, everything changes. Ice fishing looks like an entirely different sport. It’s colder, slower, and requires gear and techniques you’ve probably never used.
It’s also one of the most rewarding ways to fish. With proper preparation, it’s very accessible, and the quiet, focused experience of fishing through a hole in the ice is unlike anything else.
This guide covers everything you need for your first ice fishing trip — from understanding ice safety to catching your first fish through the ice.
What Is Ice Fishing and Why Should You Try It?
Ice fishing is exactly what it sounds like — fishing through a hole drilled in the frozen surface of a freshwater lake. Instead of casting from a bank or boat, you drop a line straight down through the ice and wait for a bite.
The experience is very different from open-water fishing. In winter, cold water slows fish metabolism. Bites are fewer, and fish typically hold tighter to structure and deeper water. But that slowness is part of what makes ice fishing so appealing — it’s quieter, more meditative, and deeply focused.
Ice fishing is best for freshwater species: yellow perch, bluegill and other panfish, walleye, northern pike, and trout. Yellow perch tend to be the most forgiving species for beginners, holding in schools that are relatively easy to locate.
If you’re worried about the cold or the specialized gear, don’t be. With the right clothing layers and a handful of basic tools, ice fishing is very accessible to anyone who has fished before.
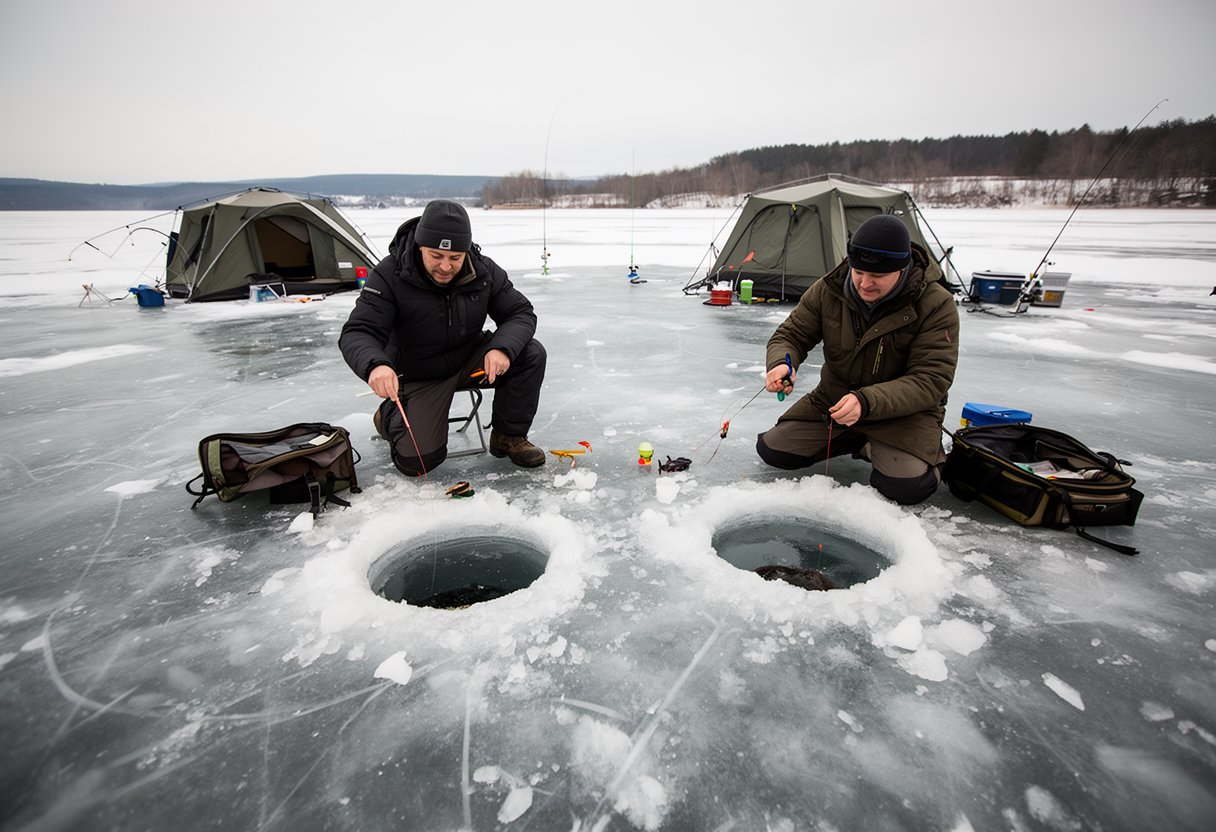
Ice Thickness Safety: How to Know the Ice Is Safe
Safety is the most important part of ice fishing. You are fishing on a surface that can break without warning, in conditions that can cause hypothermia within minutes. Respecting the ice isn’t optional — it’s what keeps you alive.
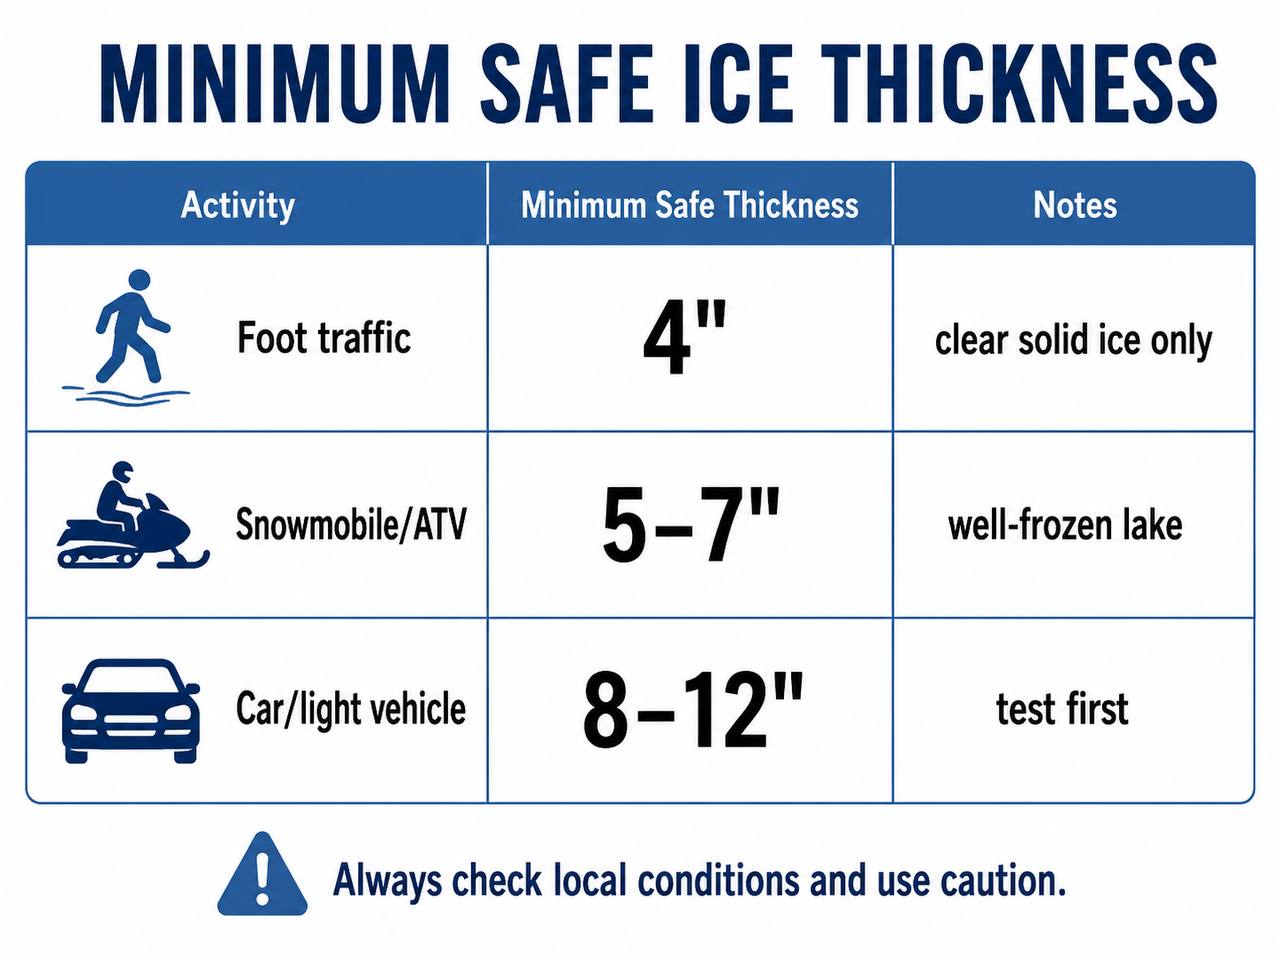
Here are the minimum ice thickness guidelines for safe travel, verified by multiple state fish and wildlife agencies including the U.S. Fish and Wildlife Service, New York DEC, and Wisconsin DNR:
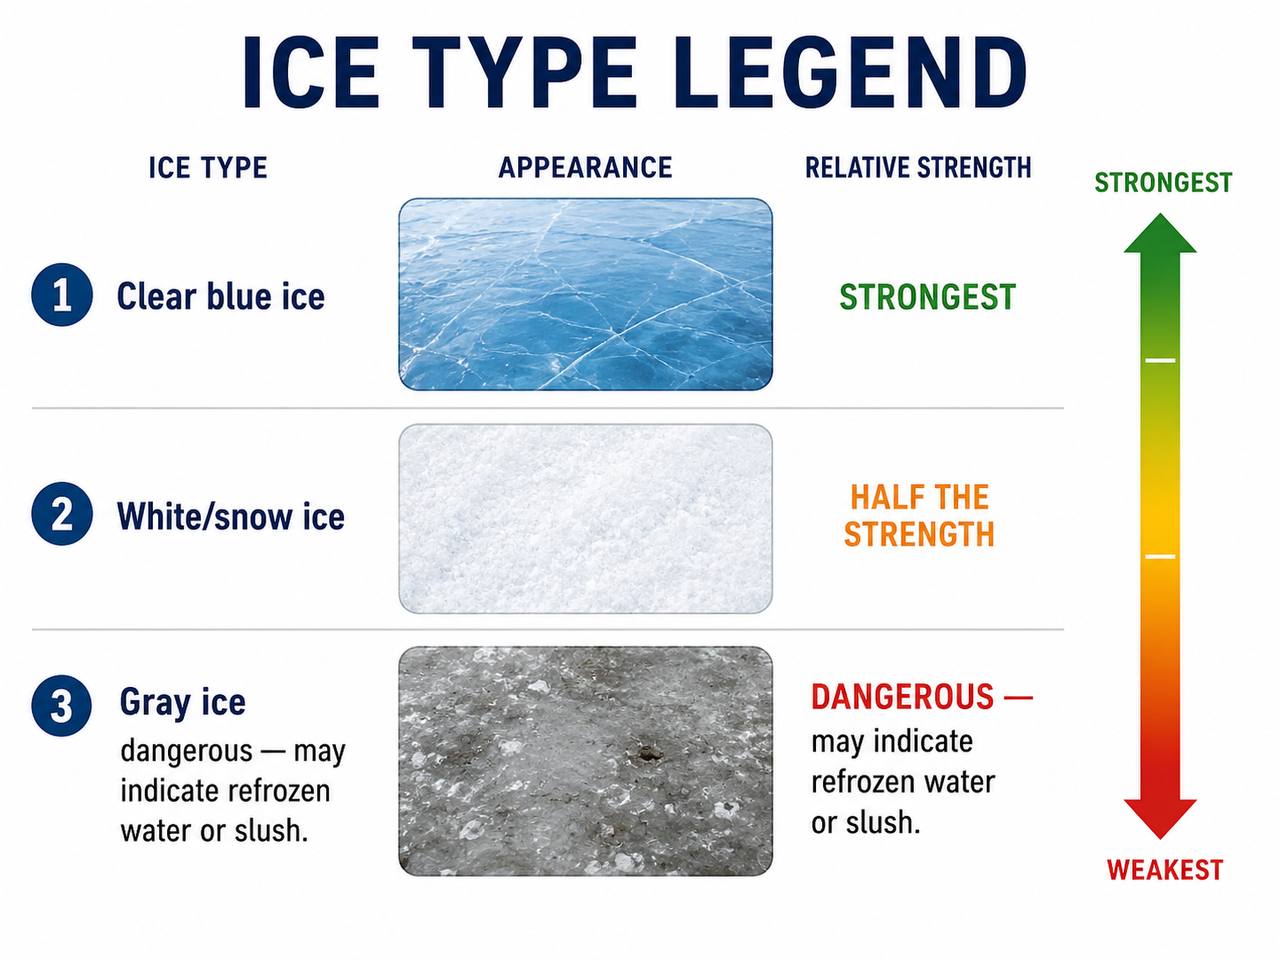
These guidelines assume new, clear ice on non-running waters. Ice that has formed under snow (snow ice) or appears gray is weaker and may not support the same weight.
Ice thickness is never uniform across a lake. It can vary by several inches within just a few feet. Near shorelines, inlets, outlets, and underwater springs, the ice is thinner and less predictable. Fall ice — the first ice that forms in late November or December — is typically the safest. Spring ice is dangerous and should be avoided, as it becomes slushy and weakens rapidly.
Before stepping on the ice, check local ice condition reports. Once on the ice, use a spud bar (a long metal ice chisel), an ice auger, or a ruler to test thickness every few steps. Drill a test hole, pull up the ice plug, and measure it directly.
Never ice fish alone, and always tell someone where you are and when to expect you back.
Essential Ice Fishing Safety Gear
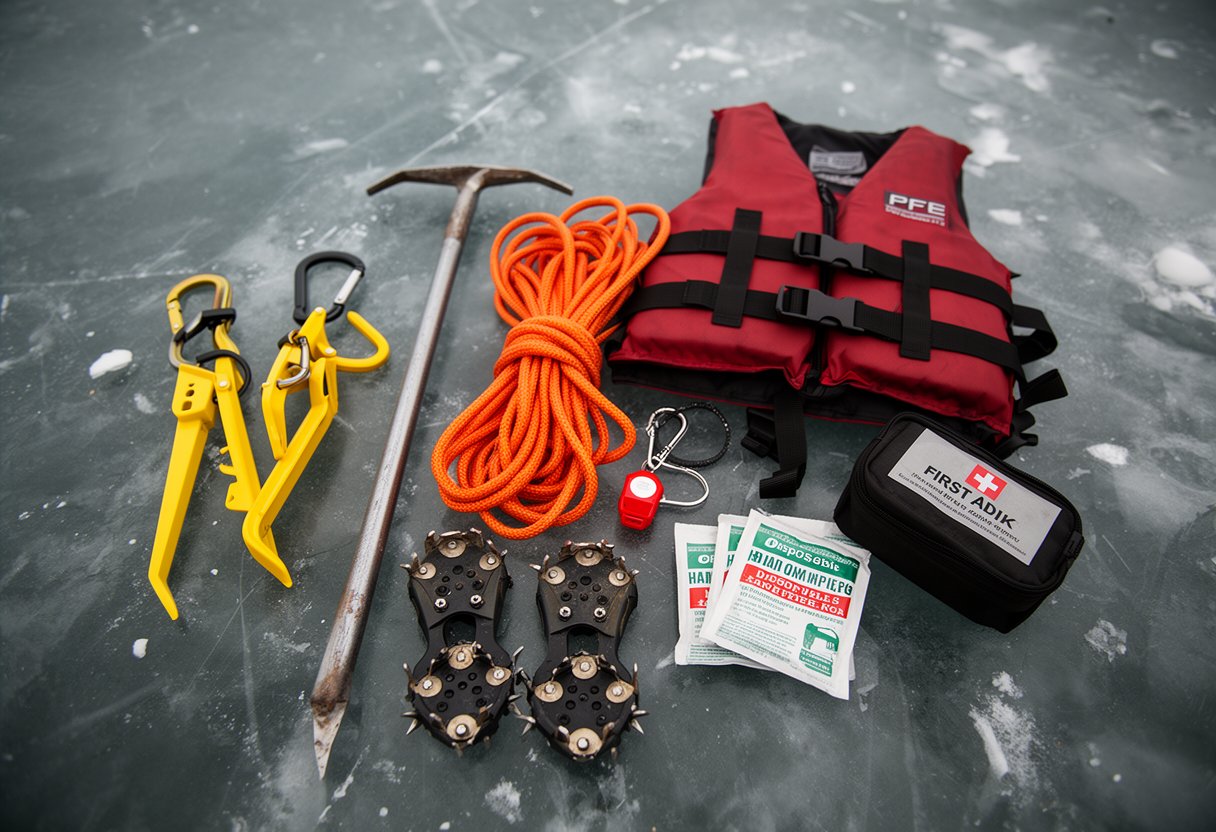
Knowing the ice thickness numbers is important, but carrying the right safety equipment is what actually keeps you safe if something goes wrong. Every time you go on the ice, you should have:
You don’t need expensive safety gear. A $15 pair of ice picks, a whistle, a coil of rope, and a spud bar are the essentials. The rest is about being prepared.
How to Dress for Ice Fishing: The Layering System
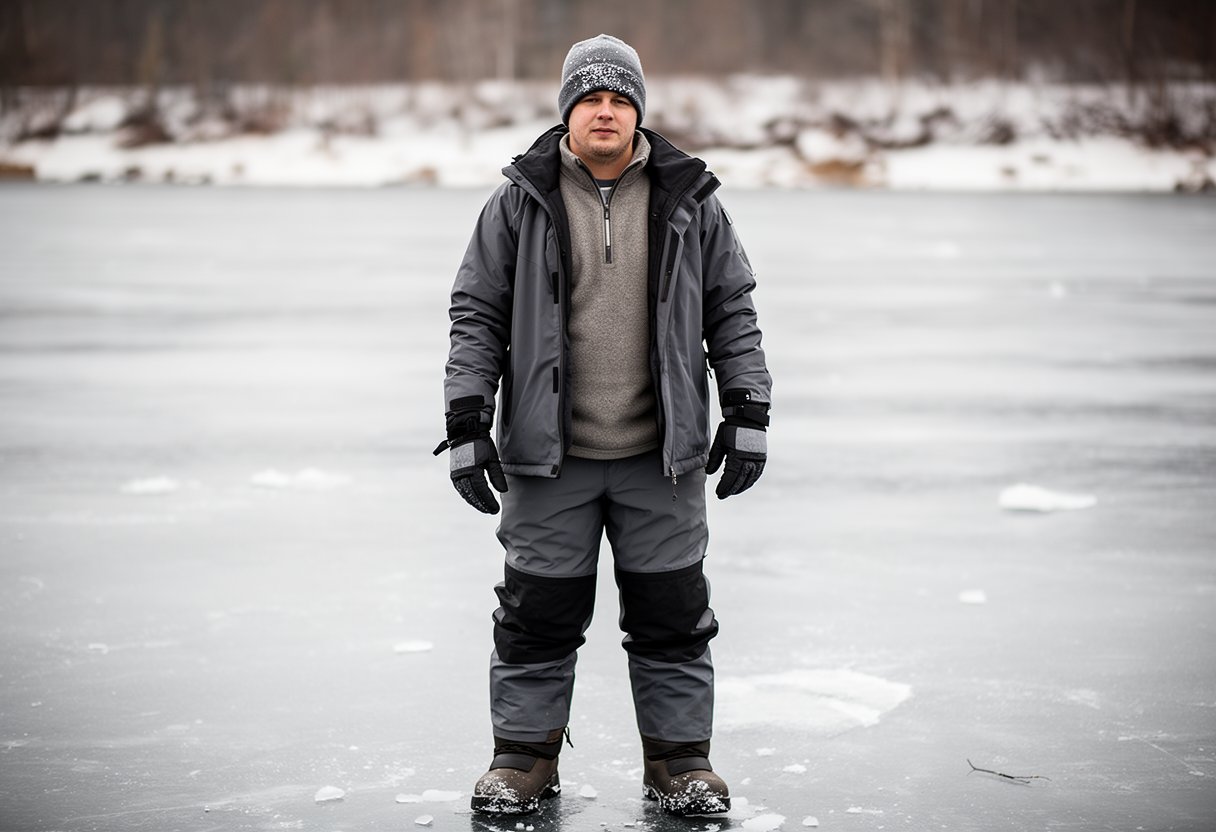
Dressing for ice fishing isn’t about buying one expensive jacket. It’s about the three-layer system that outdoor sports have used for decades.
Base layer: This is the layer against your skin. It must be moisture-wicking — synthetic materials or wool. Cotton is dangerous in cold weather because it absorbs sweat and holds it against your skin, which can lead to hypothermia. The old outdoor rule applies here: cotton kills.
Mid layer: This is your insulation layer. A fleece pullover, down vest, or wool sweater works. The mid layer traps warm air next to your body.
Outer shell: This layer blocks wind and water. You need a windproof, waterproof jacket and pants. Even if the air temperature isn’t dropping much, wind on open ice can make you feel 20 degrees colder.
Boots: Look for boots with at least 400 grams of insulation. You will be standing mostly still for long periods, and your feet are the first to get cold when you’re not moving.
Gloves, hat, and face protection: Most body heat is lost through your head and hands. A warm beanie, insulated waterproof gloves, and a balaclava or face mask for wind chill are essential.
You can start with layers you already own before buying specialized ice fishing gear. The key is having the right system — moisture-wicking base, insulating mid, and windproof shell.
Ice Fishing Gear: What You Actually Need
You don’t need a lot of gear for your first trip. Here’s what you actually need:
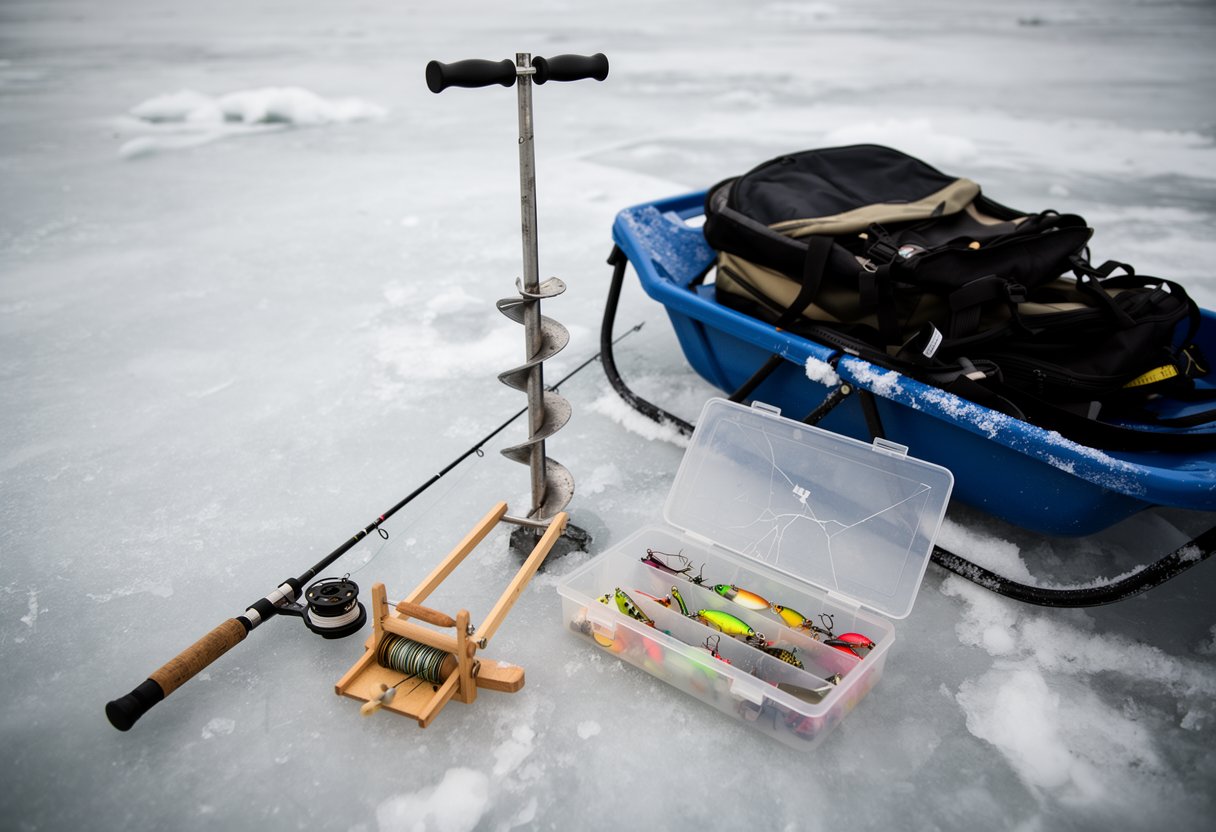
Ice auger: This is the tool that drills holes in the ice. Hand augers are lighter and more portable — they’re a good choice for beginners. Electric or gas-powered augers are faster but heavier and more expensive.
Ice fishing rod: These are shorter (typically 24–36 inches) and lighter than the rods you’d use for summer fishing. The shorter length is practical — you’re fishing vertically through a small hole, not casting long distances.
Tip-ups: These are set-and-wait devices that hold a line in the water and trigger a flag when a fish bites. Tip-ups let you fish multiple holes at once without actively holding a rod. They’re especially effective for larger fish like pike and walleye.
Tackle: You’ll need small jigs, spoons, and flies. Ice fishing lures are smaller than open-water lures because fish are less active in cold water — just as water temperature affects fish behavior and respond to more subtle presentations.
Bait: Live minnows, mealworms, and nightcrawlers are the most common ice fishing baits. Check your local regulations before heading out — live minnows are illegal on some lakes due to invasive species concerns.
Sled or gear bag: You’ll need something to haul your gear across the ice. A folding sled works well, but a sturdy backpack can work for shorter trips.
Portable shelter (optional): Small ice fishing shelters, sometimes called igloos, provide wind and cold protection. They’re nice to have but not essential for a beginner’s first trip. Many people start by just fishing in the open.
Fish finder / flasher (optional): These devices show you fish activity below the hole. They’re a nice-to-have that helps you locate fish quickly, but you can catch fish without one on your first few trips.
Three Basic Ice Fishing Techniques for Beginners
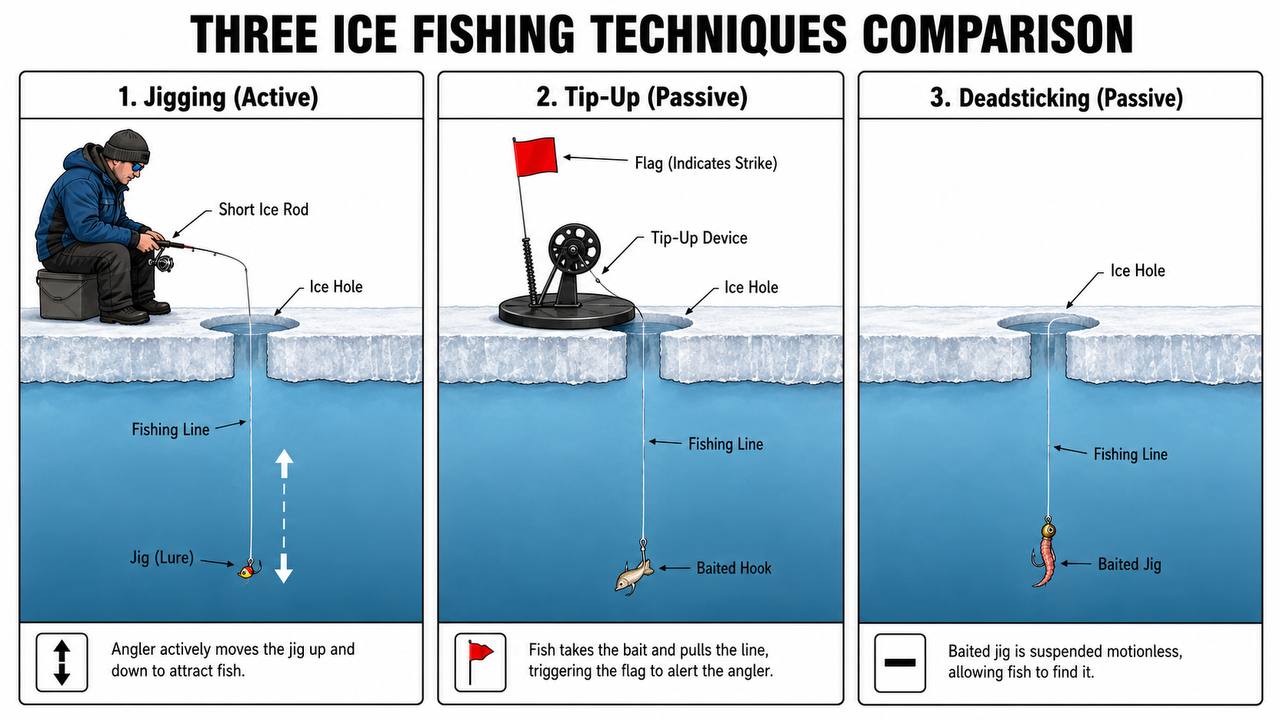
Ice fishing uses three main techniques. Each one works in different situations, and using a combination of all three is the most effective approach.
Jigging (active technique): Jigging is the most common ice fishing method for beginners. You hold a short ice fishing rod and actively move a small jig lure up and down in the water column below the hole. The key is small, subtle movements — fish are slow in cold water, and aggressive jigging can spook them. Tipping your jig with live bait (a small minnow, a piece of nightcrawler, or a mealworm) increases your strike rate significantly.
Tip-ups (passive technique): Tip-ups let you fish hands-free. You rig the line with a live bait (usually a whole minnow) and lower it to the target depth. When a fish takes the bait, the tip-up’s spool releases and a flag pops up, alerting you to the bite. Tip-ups are especially effective for larger fish — northern pike, walleye, and muskie — because they can wait at a hole while you’re actively jigging elsewhere.
Deadsticking (passive technique): Deadsticking is the simplest technique. You lower a baited jig to the target depth and leave it motionless. No jigging, no movement — just waiting. Fish find the bait on their own. Deadsticking is most effective in deep winter (mid-January through February) when fish are very inactive and won’t chase a moving lure.
A typical ice fishing session combines all three. You might drill several holes, set tip-ups in two of them, and actively jig in the third. When a tip-up flag goes up, you switch to that hole to set the hook.
Where and When to Ice Fish as a Beginner
Choosing the right lake and timing matters for a successful first trip. Here are practical guidelines:
Start small. Your first ice fishing trip should be on a smaller lake or one you already know from summer fishing. You’ll already have some sense of the lake’s depth, structure, and which species live there. Instead of drilling holes all over a strange lake, look at a map of the lake before you go and identify drop-offs, weed beds, and underwater structure.
Season matters. Early in the season (late fall / early winter), fish tend to hold near shorelines and in shallow bays — they’re still relatively active and feeding. As winter deepens (January and February), fish typically move into deeper water and hold tighter to underwater structure like drop-offs and rocky points. Late in the season (early spring), fish begin feeding more heavily as they prepare for spawning, but this is also when the ice becomes increasingly dangerous.
Check regulations before you go. Every state has different ice fishing rules. Some lakes prohibit certain baits, some have species-specific size or catch limits, and some have seasonal closures. Always carry your fishing license on the ice — wardens do check, even on frozen lakes.
Practice catch and release responsibly. If you’re releasing fish, keep them in the water as much as possible. Don’t lay fish on the freezing ice — the cold can damage their slime coat and skin, which increases mortality even for fish you intend to release. Revive the fish gently in the water at the hole before letting it go.
Ice fishing rewards patience and preparation. If you respect the ice, dress properly, and bring the basics, your first trip on the ice will be an experience you’ll want to repeat. For more on seasonal fishing patterns, see our guide to seasonal fishing by freshwater species.