
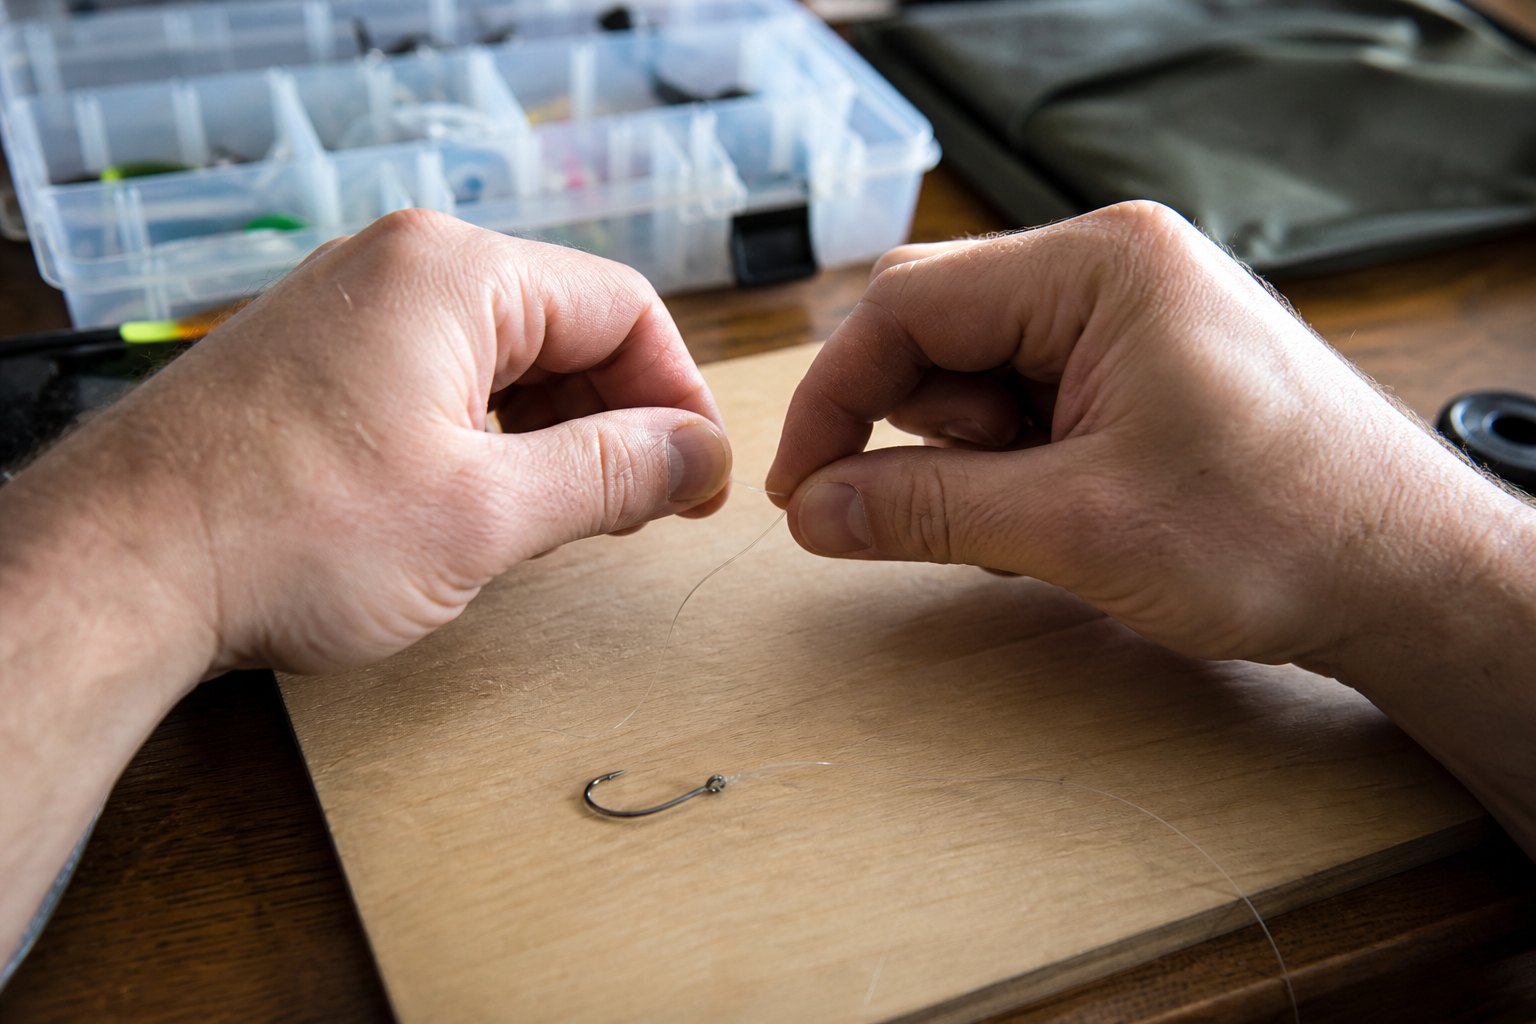
Every beginner angler who walks into a bait shop looks at the wall of knot-tying videos and thinks they need to learn a dozen knots before heading out on the water. That feeling is normal — but it’s also unnecessary. You can spend a lifetime learning new knots, but the truth is you’ll catch more fish with three knots tied perfectly than with twenty knots tied poorly.
The three knots covered in this guide are the Improved Clinch, the Palomar, and the Uni knot. Between them, they handle every common situation you’ll face: attaching a lure to your line, connecting a hook or jig, tying braided line, and even joining two lines together. That’s it. Master those three and you won’t need anything else for at least your first season on the water.
Why Knot Choice Matters More Than You Think
A poorly tied knot is the most common reason anglers lose their catch before the fish even hits the lure. The knot is the weakest link in the entire rig — stronger than the line itself, but only if it’s tied correctly. When a knot slips or breaks, you’re not just losing a fish. You’re losing a lure, a hook, and the frustration of wondering what went wrong.
Fishermen often blame the fish or the gear when a knot fails, but the truth is almost always simpler: the knot wasn’t moistened before tightening, the wraps were uneven, or the line was frayed before the knot was even tied. Learning the three knots below with deliberate practice will save you time, money, and a lot of empty calls to your buddy at the end of the day.
The best way to practice is with yarn or cheap string. Tie each knot twenty times. Then tie them twenty more times with your actual fishing line. Muscle memory is real — and it takes about 60 repetitions before a knot becomes something you can tie without thinking about it.
The Improved Clinch Knot: Your Default for Everything Light
The Improved Clinch is the knot most beginners learn first, and for good reason. It’s simple, it works with nearly every type of fishing line, and it holds well on light to medium-weight lures. If you can only remember one knot, this is the one — though having a second and third in your toolkit won’t hurt.
How to Tie the Improved Clinch Knot
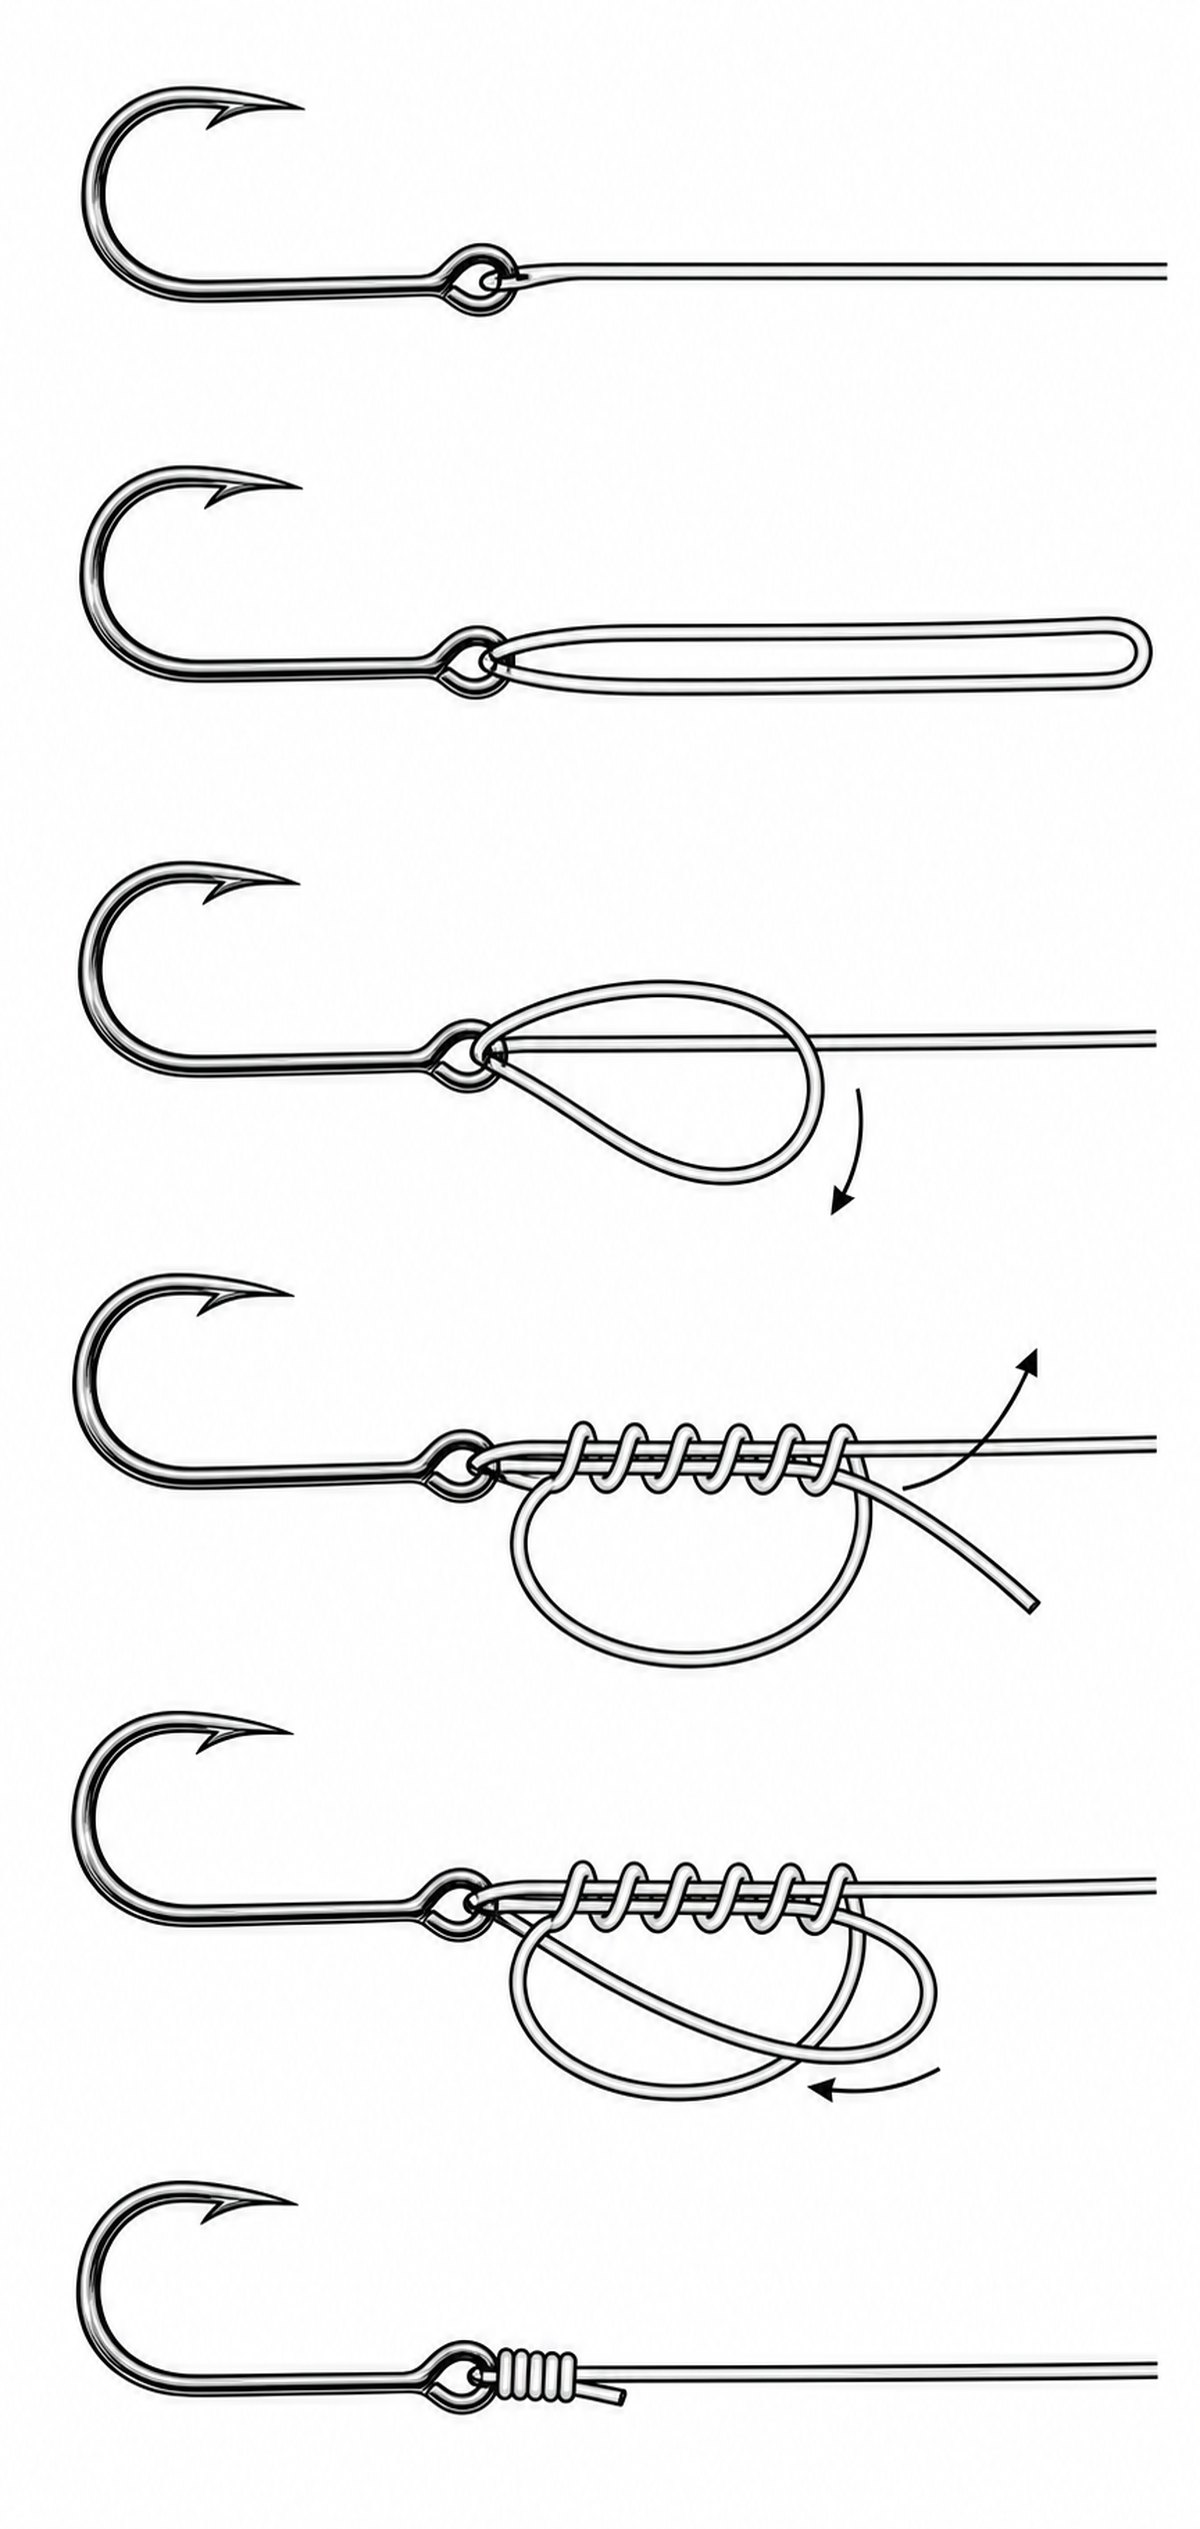
Start by threading your fishing line through the eye of the hook, lure, or swivel. Leave about 6 to 8 inches of tag end — the loose end you’ll be wrapping — beyond the eye.
Next, wrap the tag end around the standing part of the line five to six times. These wraps should stack neatly against each other, not cross or overlap. You’ll see a small loop forming near the eye of the hook — that’s the loop where the tag end will pass back through.
Before you tighten, wet the knot with water or saliva. This is critical: friction generates heat, and heat melts or weakens fishing line. A dry cinch-down can destroy your knot in seconds. The wetting step takes less than a second and makes the difference between a knot that holds and one that pops loose.
After moistening the knot, pass the tag end back up through the small loop you created near the hook eye, and then through the larger loop formed by the wraps. Pull the standing line with one hand and the tag end with the other. Tighten slowly and evenly. The wraps should slide down snug against the hook eye, locking the knot in place.
Trim the excess tag end, leaving about a quarter inch. A longer tag end creates drag in the water and can tangle with your line.
When to use it: The Improved Clinch works best with monofilament and fluorocarbon lines on light to medium lures (under ¼ ounce). It’s the go-to knot for spinnerbaits, jig heads, and small crankbaits — the kinds of lures you’ll use most often as a beginner.
Line strength: The Improved Clinch retains roughly 85 to 90 percent of your line’s rated break strength when tied correctly with monofilament. It’s not the strongest knot for heavy line, but it’s more than adequate for most bass, panfish, and walleye fishing.
Common mistakes: The most frequent errors are skipping the moisture step, wrapping fewer than five times (fewer wraps mean less friction and a weaker hold), and pulling too hard on just the tag end instead of both the standing line and tag end at the same time.
The Palomar Knot: Strongest Option for Braid and Heavy Lures
When you switch to braided line or start using heavier lures, the Improved Clinch isn’t your best bet. Braided line is smooth and slippery — it doesn’t grip itself the way monofilament does. That’s where the Palomar knot earns its reputation as the strongest and most reliable knot in the angler’s toolkit.
How to Tie the Palomar Knot
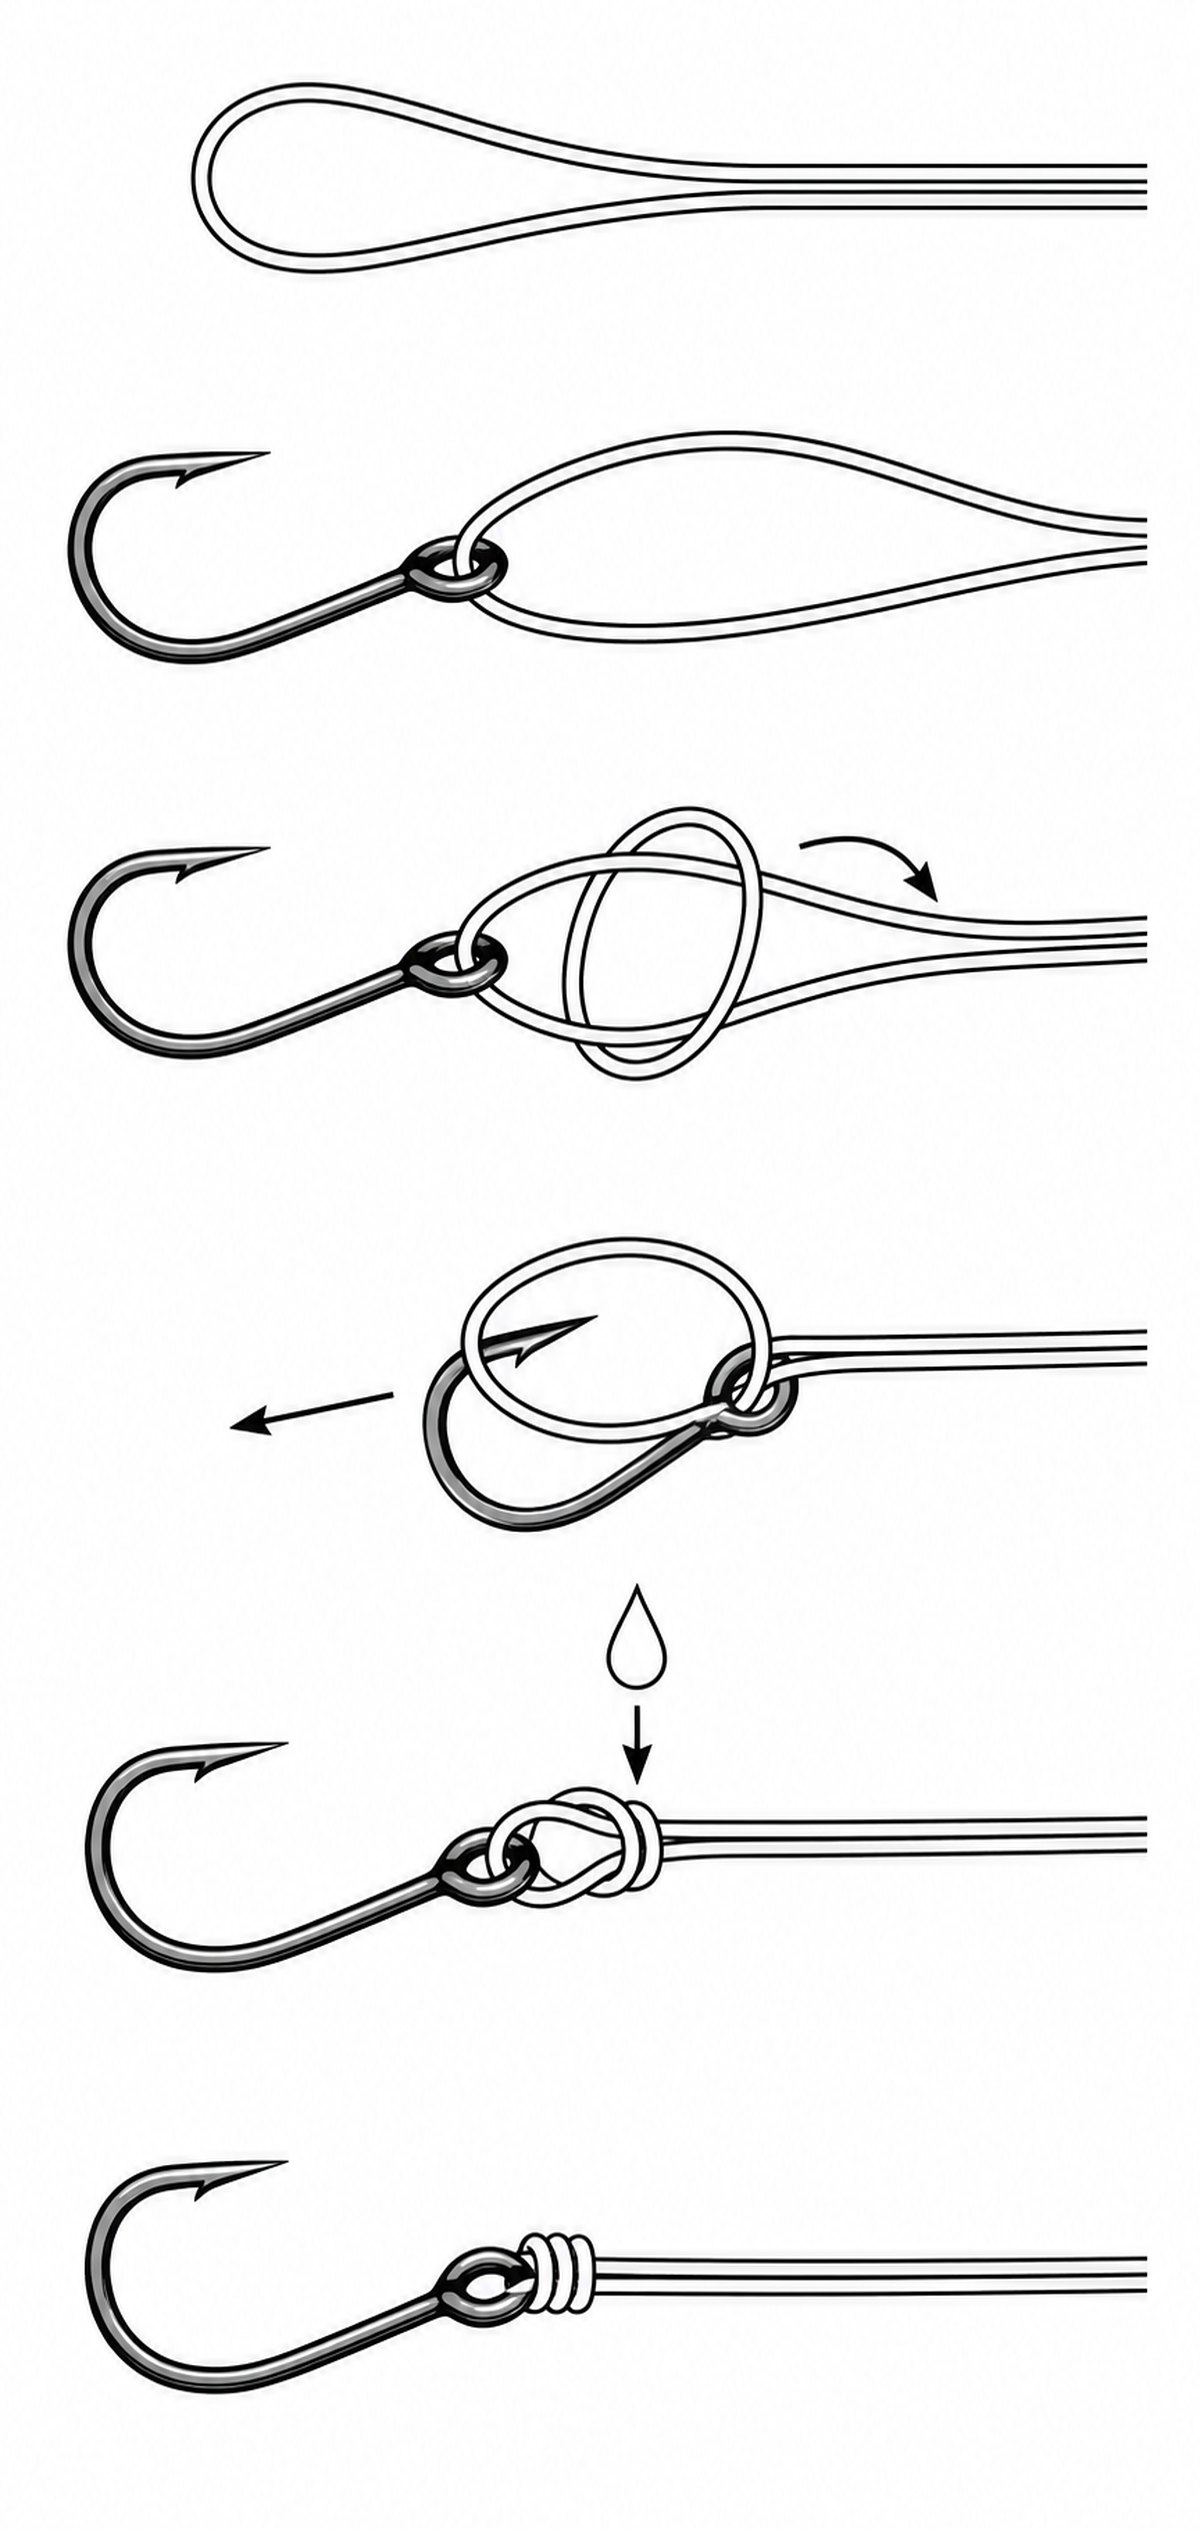
The Palomar starts differently from most knots. Instead of threading the line through the eye first, you fold about six inches of your fishing line in half to create a doubled loop. This doubled section is what makes the Palomar unique.
Push that doubled loop through the eye of the hook or lure — you’ll have a small loop hanging on the other side. Next, tie a simple overhand knot with the doubled line, but don’t tighten it yet. The hook or lure should sit loosely in the center of the loop created by the overhand knot.
Now pull the hook or lure through that loop. What was once a loose overhand knot tightens around the standing line, and the hook or lure is locked in place. Moisten the knot, pull it down slowly, and trim the excess.
That’s it. The Palomar has fewer steps than the Improved Clinch, which makes it less prone to mistakes under pressure.
When to use it: The Palomar is the top choice for braided line, heavy monofilament, and lures that weigh more than ¼ ounce. If you’re fishing for larger bass with plastic worms, flipping into heavy cover, or targeting any species with a stiff braid, the Palomar is your knot.
Line strength: The Palomar retains approximately 95 to 98 percent of line strength — the highest of any common fishing knot. It’s the knot to use when you need maximum holding power and can’t afford a slip.
Common mistakes: The most common error is forgetting to pass the hook or lure through the loop in step four. If you skip that step, the knot won’t lock and will pop off immediately. Another mistake is tying the overhand knot too tightly before pulling the lure through — it needs to stay loose enough to allow the hook to pass through cleanly.
The Uni Knot: One Knot That Does It All
If you want a single knot that works in almost every situation, the Uni knot is the answer. It connects line to hook, line to swivel, line to reel spool, and even two separate lines together. The Uni knot is the Swiss Army knife of fishing knots — not the strongest option for any single use, but the most versatile.
How to Tie the Uni Knot (Line to Hook)
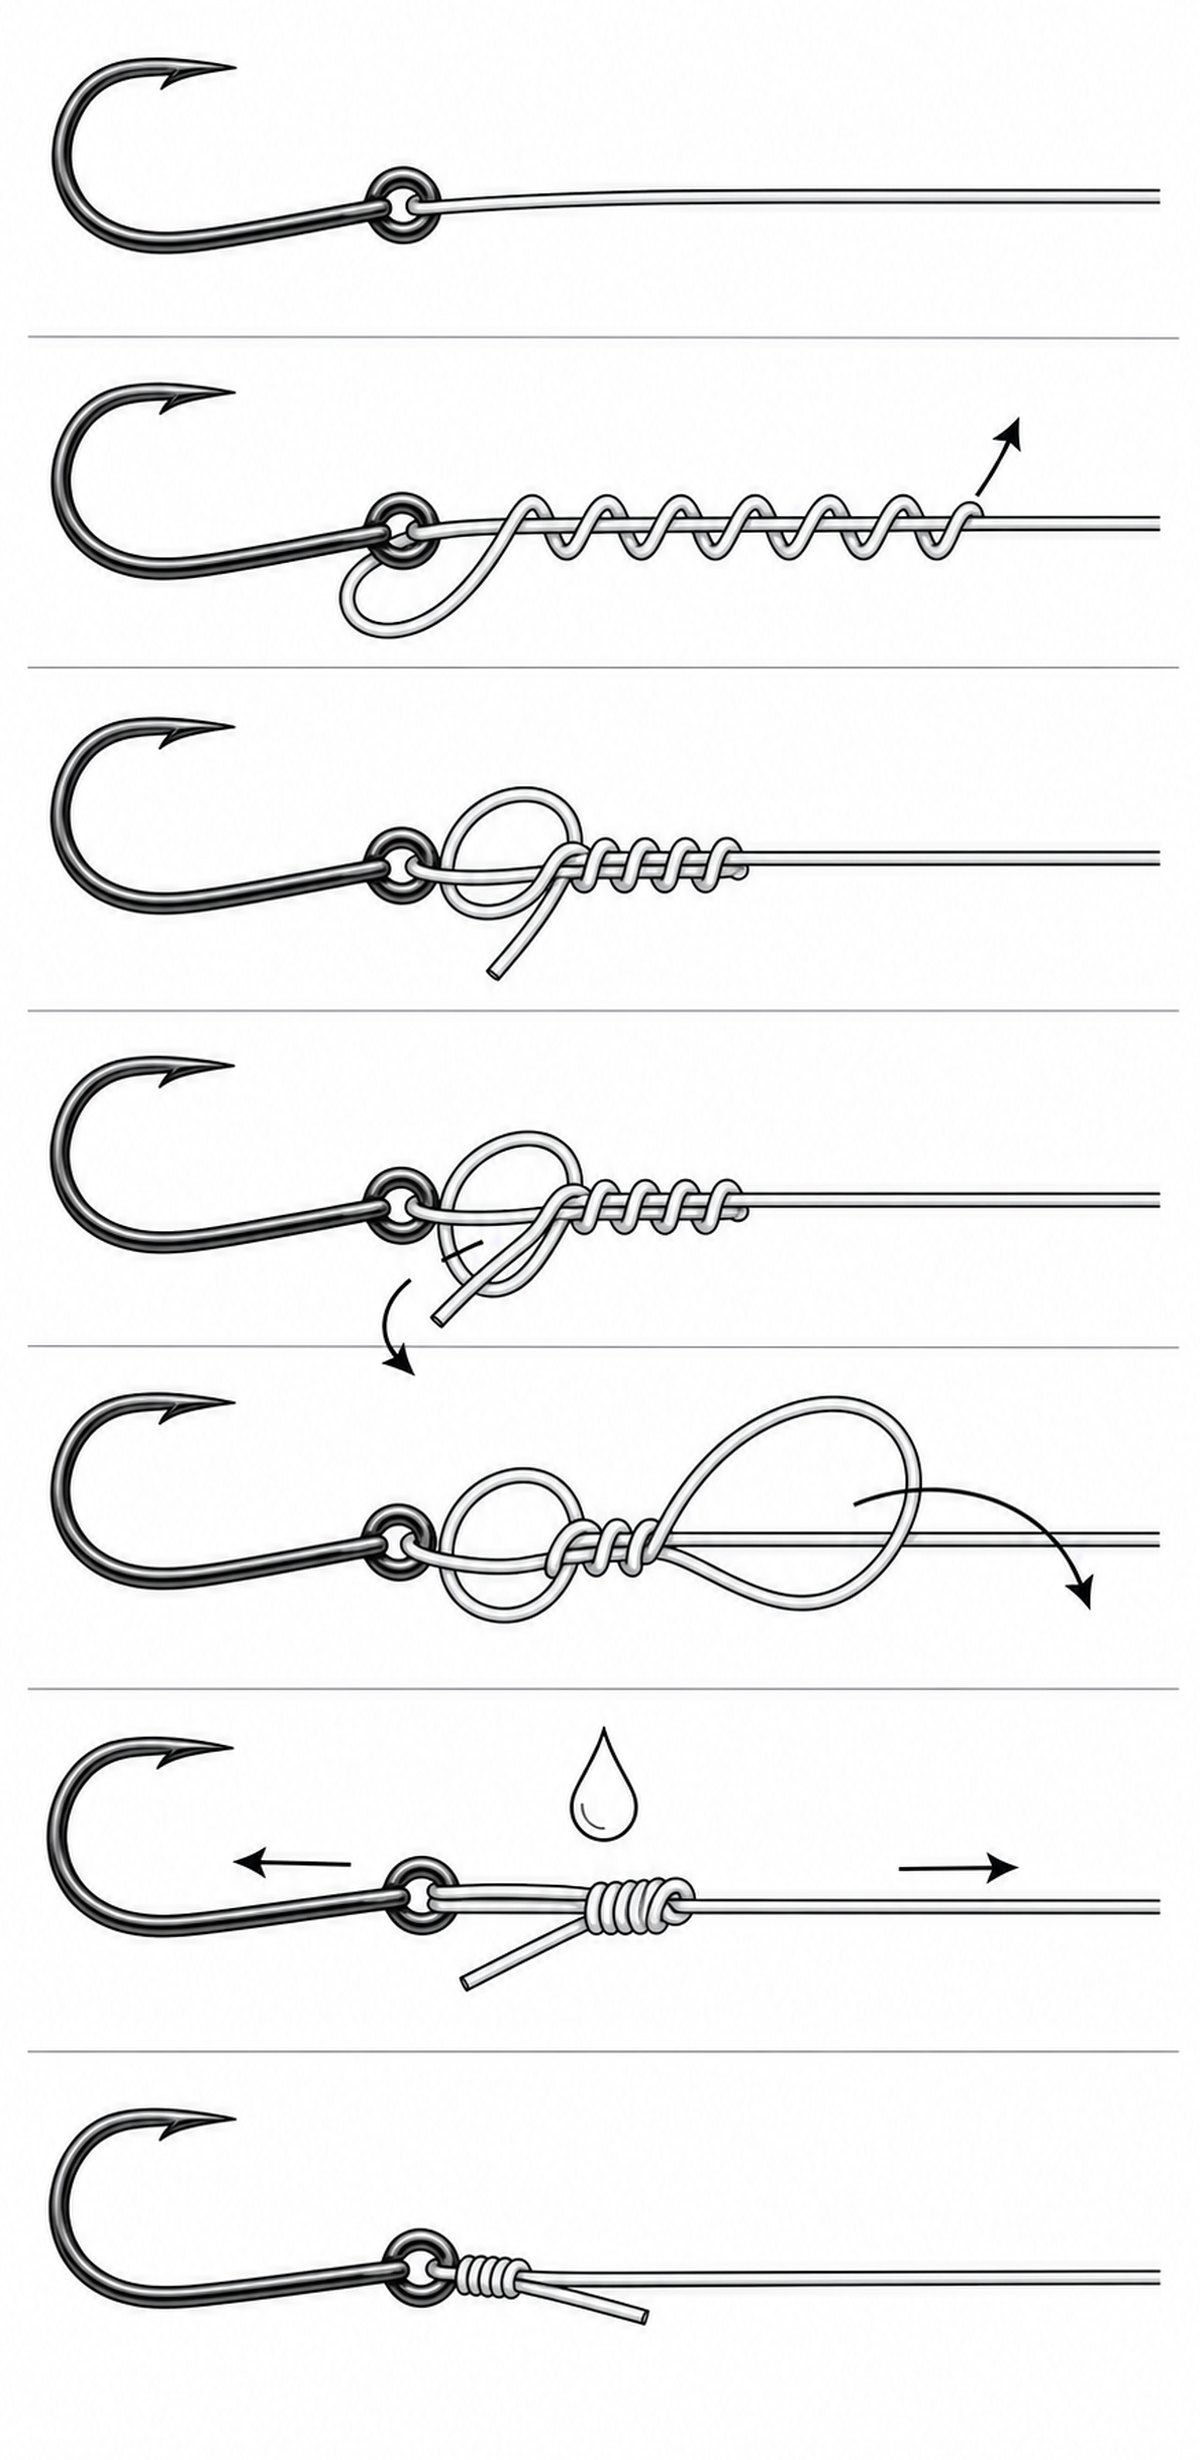
Thread the tag end of your line through the eye of the hook, leaving about 8 inches of tag end. Double the line back so the tag end runs parallel to the standing line — you now have a short doubled section.
Create a loose loop by laying the tag end over both the standing line and itself. Now wrap the tag end six times around both the standing line and the tag end, inside the loop. These wraps should stack neatly like coils on a spring — parallel and even, not twisted.
Pass the tag end back through the loop you created at the beginning. Moisten the knot, pull it down slowly, and watch the wraps cinch tight. The finished knot has a distinctive stacked appearance — six neat wraps that grip the line from multiple angles.
When to use it: Use the Uni knot for almost everything. Line-to-hook, line-to-lure, line-to-reel spool, and line-to-line splicing. It works with monofilament, fluorocarbon, and braided line. If you’re tired of switching knots throughout the day, the Uni knot covers the vast majority of your needs.
Line strength: The Uni knot retains about 85 to 90 percent of line strength with monofilament and fluorocarbon. With braided line, it holds slightly less — around 80 to 85 percent — because braid is smoother and the wraps have less friction to grip. Still strong enough for nearly all freshwater applications.
Uni knot for joining two lines: To join two lines (line-to-line Uni knot), overlap the two line ends by about 6 inches. Tie a standard Uni knot with one line around the other line, then repeat the same process with the second line around the first. Pull both standing lines to seat the two knots against each other in the middle of the overlap. This is the knot you use to attach a fluorocarbon leader to braided main line.
Which Knot Goes With Which Lure
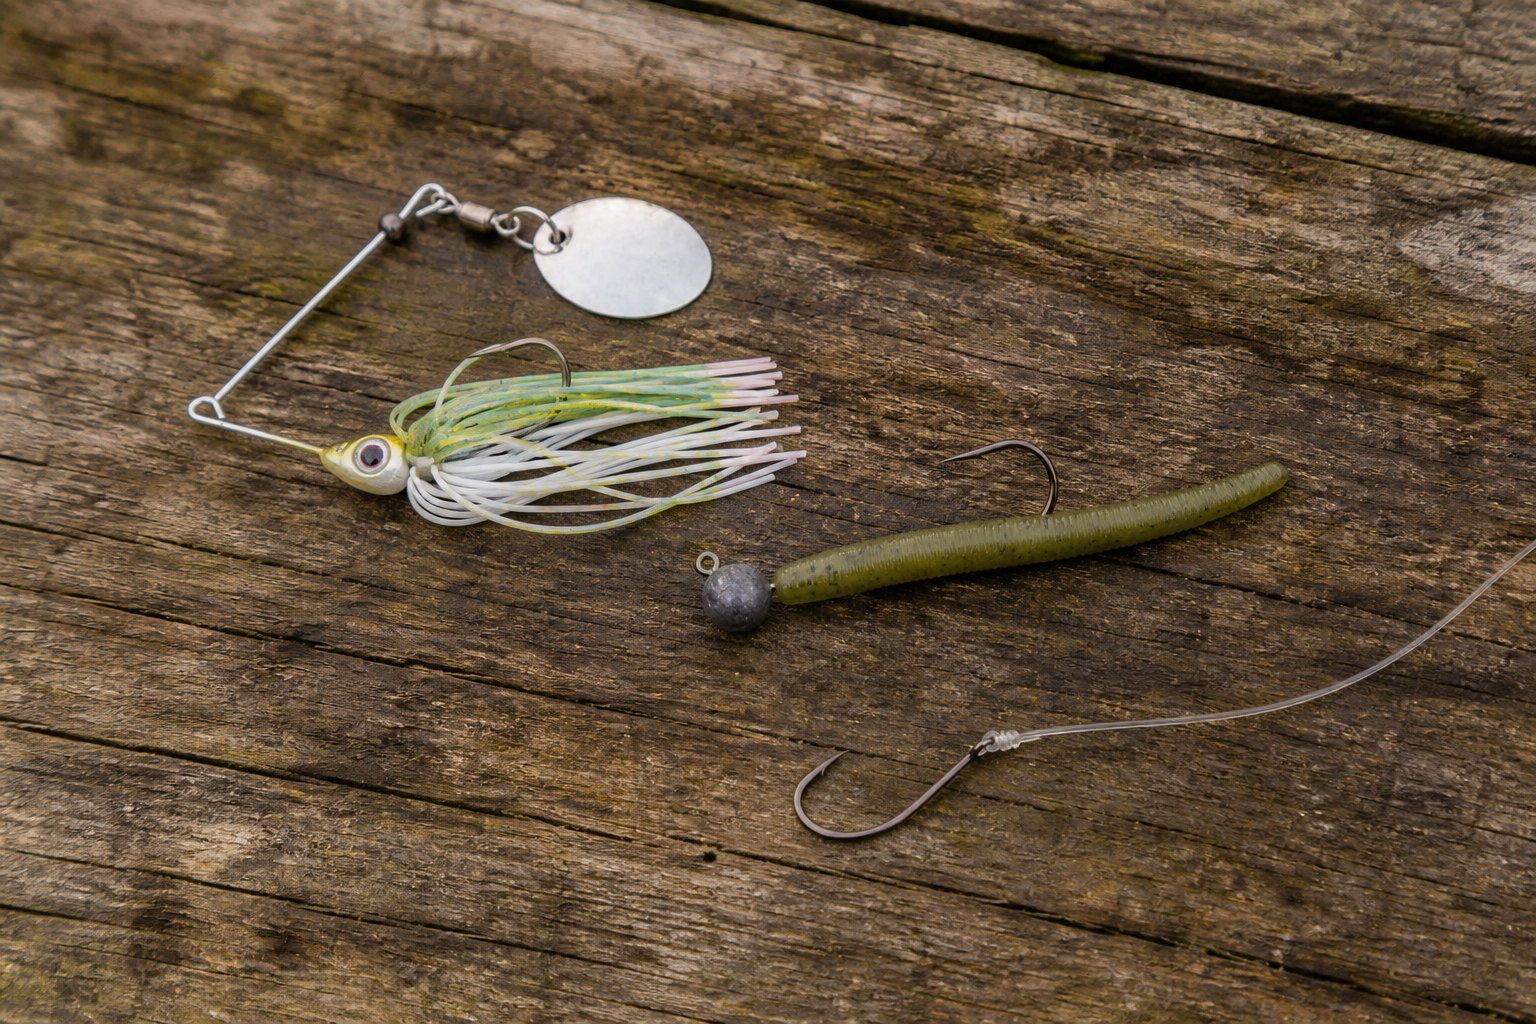
You don’t need to memorize a complicated decision chart. Here’s the simple rule of thumb:
- Light lures under ¼ ounce with mono or fluoro line: Improved Clinch
- Heavy lures or braided line: Palomar
- Everything else, including line-to-reel and line-to-line: Uni knot
This isn’t a hard rule — you could tie a Palomar to a light lure if you prefer the extra strength, or an Improved Clinch to a heavier lure if you’re fishing light line. But starting with these defaults will keep things simple while you’re learning. As you gain experience, you’ll develop a feel for which knot works best in different situations, and that’s a good thing.
Practice Tips: From Clumsy to Automatic
Learning to tie these three knots feels slow at first. Your fingers fumble, the wraps cross, and the knot won’t tighten cleanly. That’s normal for the first day or two. Here’s how to make the process faster:
Use yarn first. Cheap red yarn from a craft store behaves similarly to fishing line in terms of thickness and friction, but you can see the wraps clearly. Practice each knot ten times with yarn, then switch to your actual fishing line. The transition is smoother than you’d expect.
Lay out your materials. Don’t try to tie a knot while holding your rod, reel, and line all in one hand. Sit at a table or your kitchen counter with a length of line, a hook, and a cup of water nearby for moistening. A clean, flat surface makes a big difference in how evenly your wraps come out.
Time your practice. Set a timer for three minutes and try to tie each knot as many times as you can. Track your count. The first session might be five reps per knot. By the end of the week, you should be able to tie each one cleanly in under fifteen seconds.
Check your knots before every cast. A quick tug on the standing line right after you finish tying tells you whether the knot seated properly. If it slips or doesn’t tighten evenly, re-tie it. The extra five seconds before you cast saves you from losing your lure three casts later.
Bottom Line: Quality Over Quantity
You don’t need a dozen knots to be a successful beginner angler. The Improved Clinch, the Palomar, and the Uni knot cover virtually every situation you’ll encounter on the water. Focus on tying each one cleanly and consistently, practice until it becomes automatic, and you’ll spend less time at the tackle box and more time catching fish.
If you want to learn more about building your first fishing setup, check out our guide to choosing a freshwater rod and reel combo for beginners. And if you’re curious about the best knots for saltwater fishing — which has slightly different demands — our beginner’s guide to saltwater pier fishing covers knot selection for brackish and saltwater conditions.
Three knots. A lot of practice. Catching fish. That’s the whole equation.